
Whether you call it a clearomizer or a vape tank, you should know the best ways to get the maximum life out of your investment. Here we have 5 simple tips to keep it vaping for as long possible.
Now, we know that there are many different tanks on the market. Regardless of the manufacturer and the name on the side, every vape tank can be broken down into pretty much the same component parts. Most tanks are made up of a drip tip, glass sleeve (which makes up the body of the tank), some o-rings to keep everything sealed, and a top and bottom section that hold everything, including the coil system in place. That may be slightly oversimplified, but you get the picture.
We are going to take the next few minutes looking at some of the most common reasons people end up making a trip to the vape shop because of their favorite tank just dumping e-liquid all over them and quit working. We are then going to look at the simplest and easiest ways to make sure that your favorite tank keeps on ticking. Take a moment and see if you are missing any of these steps in your cleaning and caring ritual.
Vape Bands Aren’t Just There To Look Pretty
 The top reason for vape tanks biting the bullet is clumsiness.
No, I am not calling you clumsy per say, but knocking a device over and cracking a tank is an ever-present danger. Life happens, and I have broken a glass or two in my time.
Vape bands are little rubber rings that you put around the tank – I am sure you have seen them and some tanks are now sent out from the factory with some in the box. Simply putting the band on the tank will make it less likely to come into contact with a hard surface and smash.
They are inexpensive and can be found in a variety of colors and styles, many are emblazoned with fun sayings or company logo’s. While you may think that vape bands aren’t for you, bear them in mind the next time you have to replace your glass.
Clean It Regularly
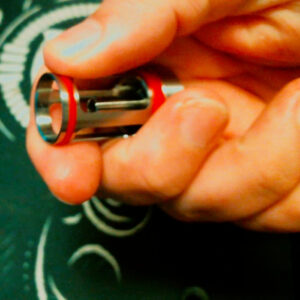 When using tanks, I will rinse them out with warm soapy water at least once a day. I take them apart and clean every individual part even if I am not changing the coil. While it may appear to be overkill, I am ensuring that no dirt or debris is getting the chance to get into any nooks or crannies.
The tank works because of a vacuum seal. If there is so much as a tiny fissure for air to get into the system you are going to be wearing e-liquid and by making sure that everything is clean you are minimizing this risk.
While this may seem like common sense I have seen many tanks that look like they have had thousands of mil’s of juice ran through them and have never once seen the inside of a sink.
Wear And Tear
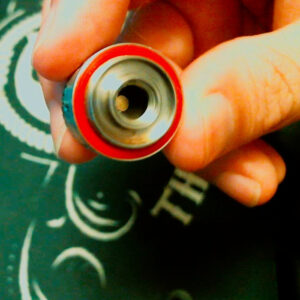 However you want to look at it, your tank is a tiny machine that has parts that can break or get worn down over time.
Visual inspecting these elements will allow you to troubleshoot any problems before they arise and turn into bigger problems. The main areas that can and do fail on a vape tank are the o-rings and insulators.
If you see that the o-rings are looking tattered and torn they are simple enough to replace. You should have gotten spares when you bought the tank and further replacements are easily obtainable. The insulator on the bottom of the tank may be slightly more problematic but most companies now offer replacements for a small fee.
Check the 510 pin from time to time to make sure it is seated correctly as use with some devices can move its position. If this has moved or the insulator around it has moved, you could be faced with a catastrophic failure the next time you use it.
Did You Put It Together Properly?
 I have had many vaper’s, especially new ones, bring me tanks that were leaking. Make sure that when you put a tank together, after changing the coil or adding more e-liquid, that all the components are seated correctly.
On a few occasions, the coil wasn’t screwed into the deck because no one had ever shown the user how to perform basic maintenance on their equipment. make sure that all the threads are screwed in hand tight and you will never have a problem.
That vacuum seal is the most important aspect of the tank working correctly and a loose thread could be the reason that you just lost 5 ml of liquid.
Use It As The Manufacturer Intended
 Coils have ratings. If you look on the side of the majority of pre-made coils you will see the working limits for it and you should pay attention to those numbers.
Many tanks are now offering build decks, allowing the user to put their own coils into the tank and giving them the ability to decide exactly what they are vaping.
Just remember that this is still a tank regardless of the size of the build deck and just because you can fit a zero point zero stupid build in there doesn’t mean you should.
If you want to get the best performance out of you vape tank system, treat it as one: use the manufacturers coils as guidelines when creating your own or melting the insulator and rendering the whole thing useless will be in your future.
Conclusion
These are simple and easy tricks to keeping your vape tank around for a while, and even though this list is not exhaustive it will allow you to keep your favorite tank around for longer than a couple of weeks.
As always, enjoy your vaporizer and vape safe!





Great tips here for maintaining your vape tank. The cleaner you can keep it, the longer your pen should last. Thanks so much for the advice.