

The Kayfun Lite Plus has become the staple of Rebuildable Tank Atomizers for the vaping market. In fact, the Kayfun series didn’t surprise many when it was voted the best tank system in GuideToVaping’s Best of 2013 event. Out of the 2,749 total category votes, the Kayfun series received 1,516 of those votes, while the rest were scattered amongst other products. In the vaping world, the Kayfun is an old product, and the reason for this is the result of new and more improved upon designs entering the quickly growing vape market.
However, there are still those vapers out there that have yet to take the plunge into the rebuildable market, partly due to the lack of knowledge, intimidation and the ease of use that clearomizers offer. I too was one of those people that preferred clearomizers, but that was only because I didn’t know exactly what to do with rebuildables, what my limits were with them, and there were no clear how-to’s on how to build these coils step-by-step. I’m the type of person where I learn best when things are broken down into dummy format – meaning, I can understand it if everything was explained in detail and broken down into steps, with pictures included.
With that said, I’ll be breaking down how-to build a Kayfun Lite Plus coil for those of you who have yet to enter this portion of vaping. The coil and build process can apply to other types of rebuildable atomizers as well.
Tip: I used to be married to Aspire clearomizers until I learned how easy it was to build coils, use rebuildable atomizers and the difference in flavor and vapor. Just because you are using a rebuildable atomizer doesn’t mean you’ll have to change your e-liquid flavor, PG/VG ratio or even nicotine strength. I currently vape Texas Select Vapor’s Pearalyzing Peach (60PG/40VG) at 18MG strength. My coil is 1.4ohm’s and I vape at 16 watts.
Apologies in advance. Some of the pictures are under/over exposed. Still learning how to use my camera. 🙂
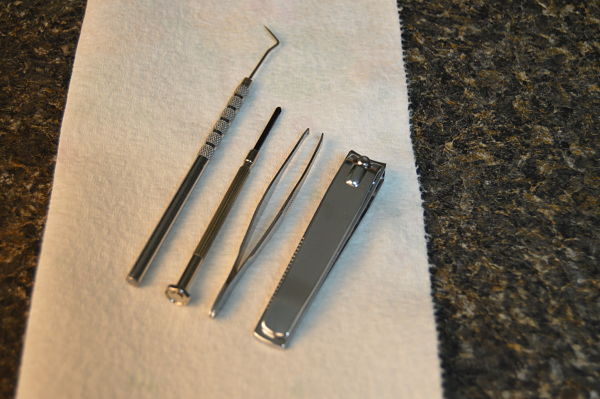
Tools Needed
- Tweezers
- Toenail Clippers (anything to cut wire with)
- Paper Towel
- Precision Screwdriver Set (can be purchased at walmart, dollar general, etc)
- Precision Pick Set (can be purchased at walmart or any hardware store)
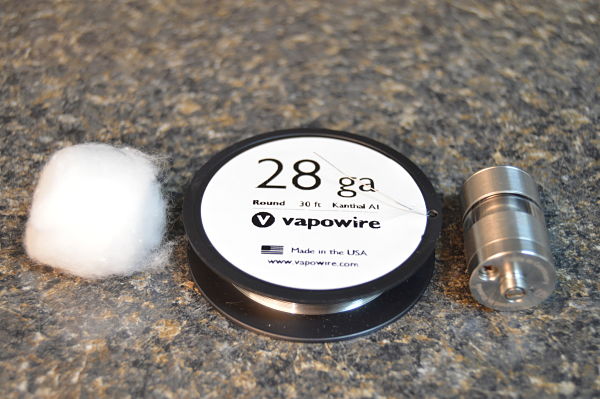
Products Needed
- Kayfun Lite Plus (or other similar rta)
- 28 Guage Kanthal Wire (can use different guage wire, but will require more or less wire wraps)
- Organic Cotton (can be purchased at CVS or most retail store pharmacies)
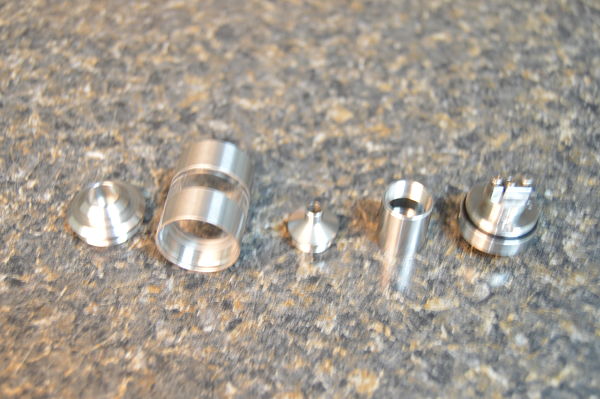
1. Taking Your Kayfun Apart
In this first step, you’ll want to begin by taking your Kayfun apart. If you’re new, this is the time where you want to really pay attention as to how you take everything apart so that you’ll know how to put it back together. I’ll take my Kayfun apart and lay it out as to which piece should be taken off first to last. If you get confused at any part, please feel free to comment on this post and I will respond as soon as I see it.
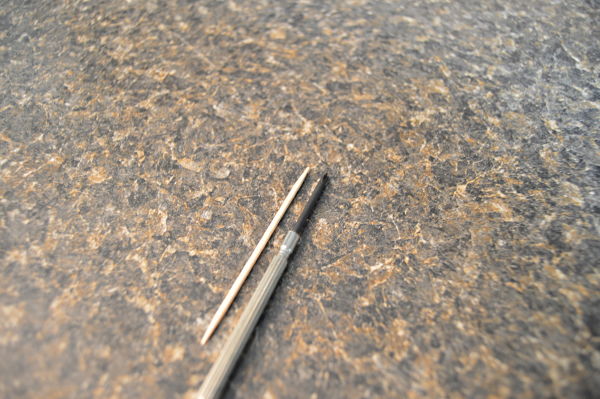
2. Choosing Which Screwdriver To Wrap Around
In the precision screwdriver set there will be different sizes of screwdrivers. You’ll want to choose one that is the size of a toothpick or maybe even a hair larger. If you want to use a different size, you can, but you’ll need more or less wraps. After doing this a few times you’ll start learning how many wraps you need for what size you’ll be wrapping your wire around. Since I’m using a regulated mod (vapor shark), I honestly don’t pay much attention to my wraps or know the exact ohms I’ll get from the size of what I’m wrapping around and the guage of my wire. I simply use the same screwdriver each time and make about 6/7 wraps, which typically puts me around 1.3 to 1.5ohms.
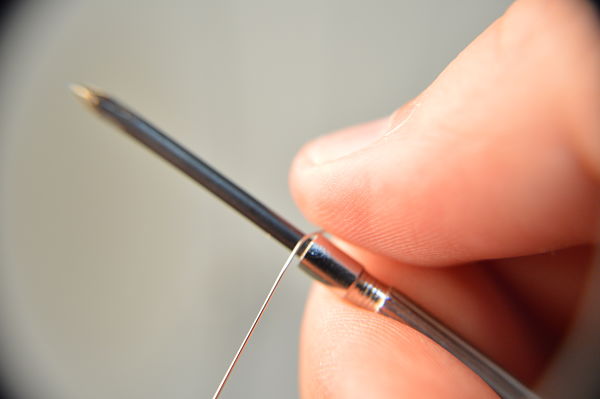
3. Making Your Wraps
In this third step, you’ll want to wrap your wire around the screwdriver as tight as you can and as close together as possible. When I wrap my coils I start how you see in the picture below.
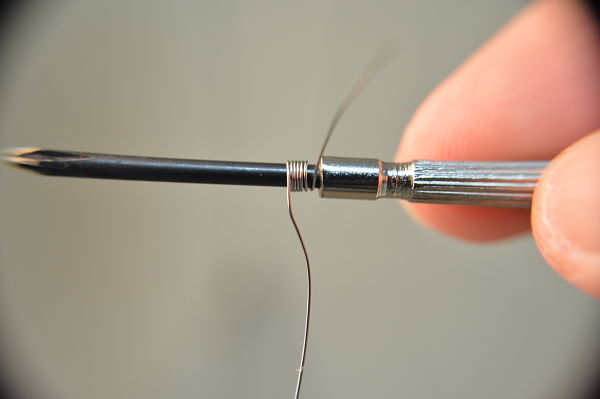
4. What Your Coil Should Look Like
This is what it looks like when I’ve wrapped the wire into a coil. If your wraps aren’t all touching each other, it’s okay. In a later step I’ll show you what to do to fix this. Don’t worry about it for now.
5. Installing Your Coil
Installing your coil is the most difficult, or at least it is for me. I hate messing with tedious stuff, so getting the wire around the screws is the most aggravating. Some atomizers have posts where you can just stick the wire in holes, but the Kayfun Lite Plus, you’ll have to wrap the wire around the screws and tighten the screw onto the wire to hold it. Once you have the wire around the screws and have tightened them down, cut off any excess wire.
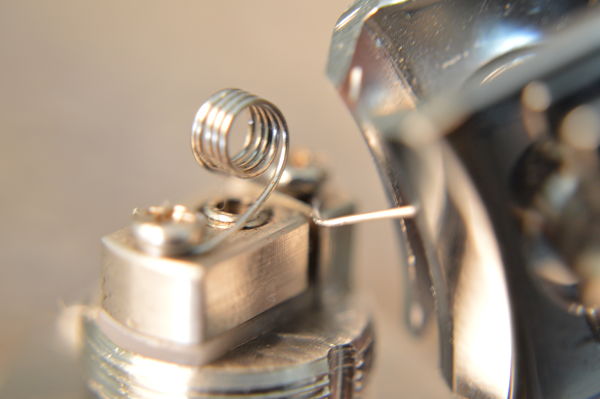
6. Positioning Your Coil
After your screws are tightened down, you’ll want to insert the screwdriver you used back in the coil. When pushing the screwdriver through, its best to twist the screwdriver as that helps it go through easier. Once you have the screwdriver in, pull up just a bit and position the coil so that it isn’t crooked or anything. It should look straight and off the bottom like the picture below.
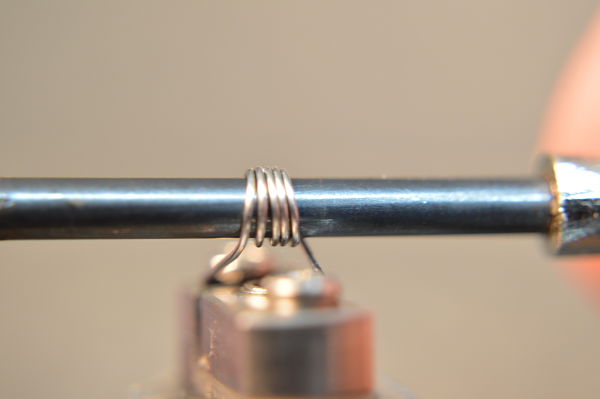
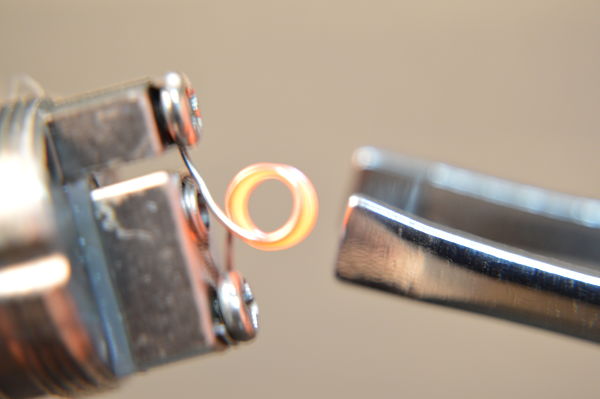
7. Tightening Your Coil
This part is where you’ll be tightening your coil. If your wire wraps weren’t touching each other in step 4, this will fix it. Put your atomizer on your device and hit the fire button. Once your coil gets red hot, let it go, then squeeze it just a bit with your tweezers. When you heat the wire it becomes stiff, so when you let it cool down and your tweezers are holding the wraps together, it will start forming to that shape. You can do this as many times as it takes to make sure your wraps are touching and look good. In addition, your coil should always heat up from the inside out. This means the middle of your coil should turn red first, then it should disperse outwards. If your coil doesn’t do this, you need to either reposition your coil or tighten your wraps more.
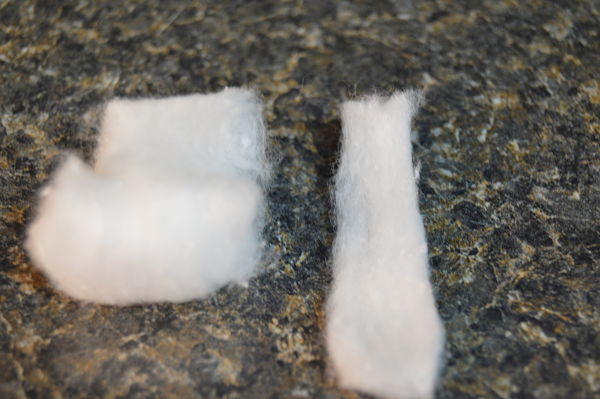
8. Cutting a Strip of Cotton
In this step, you’ll want to get one of your cotton balls and open it up so that you can cut a strip from it. In the picture below is the size of strip I use. You don’t want to cut too big of a strip or too small of a strip. If the strip is too big, it may not fit in your coil and it might not wick e-liquid properly. If the strip is too small, it may give you dry hits and may even burn your coil up.
EDIT: I’ve learned, credits to the community, that I should be using less cotton on my builds. I would say cut about 1/4″ of a strip to use on your builds.
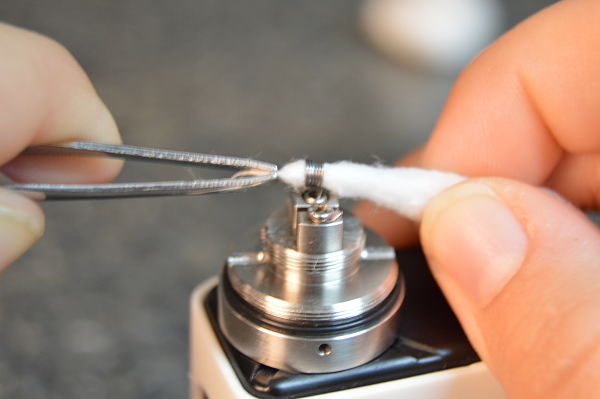
9. Inserting Your Cotton
You’ll want to take your strip of cotton and roll it up. Don’t roll it too tight though. You want it to still feel a little spongy. The ends of the cotton should be rolled to a point where you can insert the cotton through the inside of your coil easy. Slide it through and it will help if you use your tweezers to pull the cotton through. Have the cotton positioned in the middle and make sure the cotton is fluffy on each end of the coil.
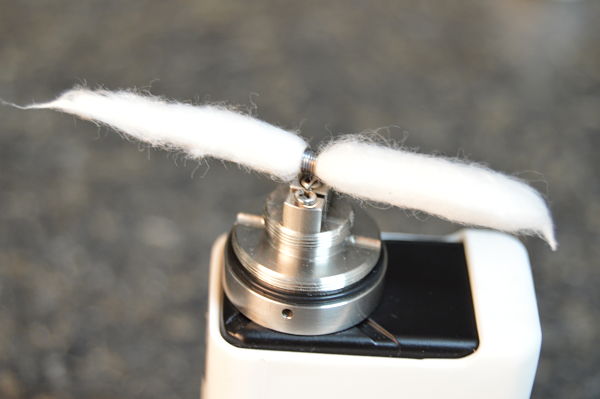
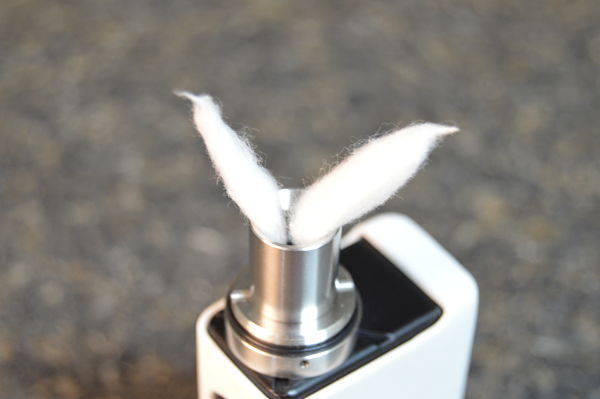
10. Overlook of Setup
This is how your coil and cotton wick should look after these steps.
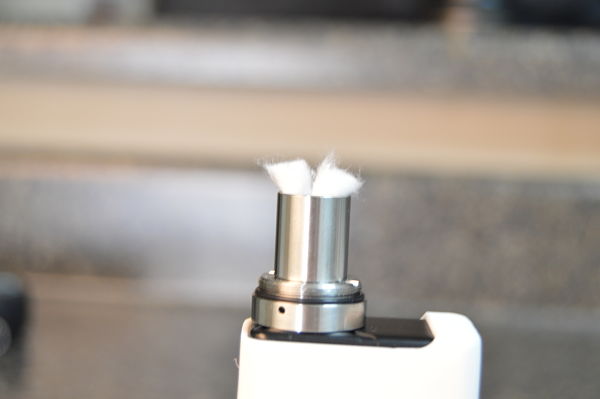
11. Adding Your Coil Enclosure
Now you’ll want to pull the ends of your cotton up, hold them together and insert them into your coil enclosure. The ends of the cotton should be sticking up like the picture below.
12. Cutting Your Excess Cotton
With the cotton ends sticking up, you’ll now want to cut the excess cotton off. Make sure to leave about 1/4″ sticking out of the enclosure just like in the picture below.
EDIT: After learning from the vaping community that I’m using too much cotton, I’ve also learned that I should have less cotton in the enclosure. Before putting on the enclosure, cut the leads of cotton to where they just wrap down and lay on the deck. If you’re confused about this part, let me know and I’ll upload a picture explaining how.
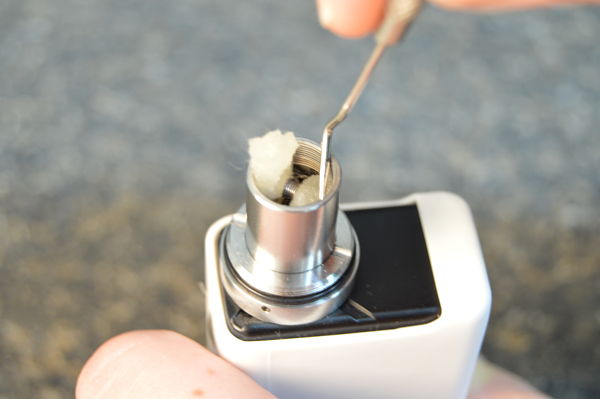
13. Pack Your Cotton
You will now need to use the precision pick. Saturate the cotton with e-liquid and then push it down to the bottom. Don’t push it down tightly, just enough where it hovers over the bottom deck. You’ll want to position the cotton ends just below where it comes out of your coil.
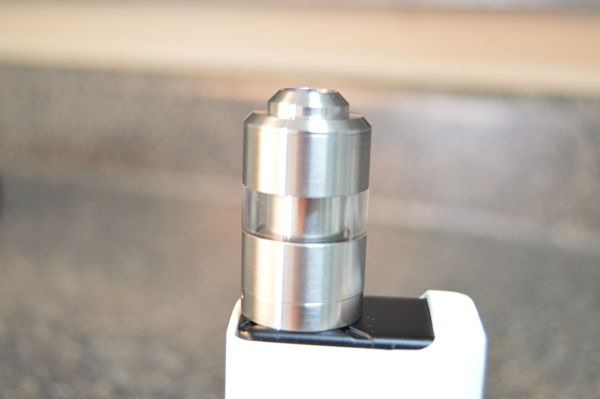
14. Put Your Kayfun Back Together
Now that you’re done, you can put your Kayfun back together. In this step, I always fire my coil just to make sure everything is still working before I put it back together and fill it with e-liquid. If you don’t remember how to put it back together, look at the picture in step 1 to get an idea. If you can’t figure it out, comment on this post and I’ll help you.
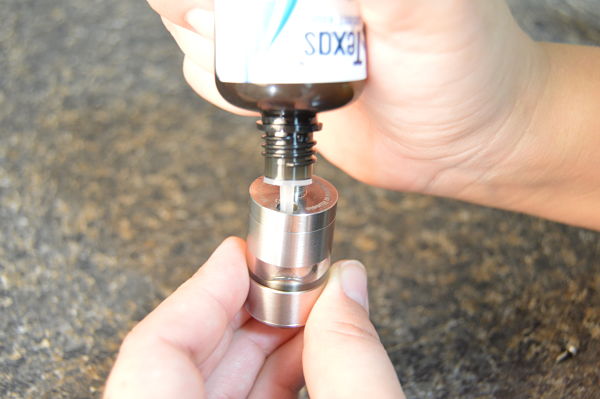
15. Fill Your Tank With E-Liquid
On the Kayfun Lite Plus, the e-liquid fill hole is at the bottom of the tank. If you’re using another device, the way you fill your tank may differ. On the Kayfun Lite Plus, unscrew the screw at the bottom, fill it with e-liquid, then screw it back in. After you fill it, there’s always excess e-liquid on that screw and around it, so be sure to wipe that area with a paper towel so that it doesn’t get all over your mod.
Now that you’ve built your coil, wipe off any excess e-liquid with your paper towel (e-liquid sometimes runs through the air hole on the side when setting up). You’ve just built a Kayfun Lite Plus Coil. Vape from your Kayfun for a minute, then go back to your clearomizer and notice the huge difference in taste. The flavor pops out and the experience is ten times better on a rebuildable atomizer.
If this how-to helped you in some way, please feel free to comment below and let me know!


I love this step by step tutorial Blake! I am going to be sharing an redirecting my customers to check it out. Feel free to make as many step by steps with pics as you’d like, they are very helpful.
Awesome! I’m glad you liked it. I’ll be posting more detailed builds in the future, so definitely keep an eye out! Btw, nice to see a local on my site! 🙂
Nice tutorial. Right to the point and not a lot of superfluous babble. Used it to wrap my first coil and so far, it seems to be a success. It ain’t the prettiest coil you’ll ever see, but it works and I’m happy. I somehow changed the resistance from 1.5 to 1.7. Is this a problem? Too many wraps? Thanks for the instructional.
The resistance will fluctuate a bit. Anything from tightening the post screws to turning the coil a bit can mess with the resistance. That little change in resistance won’t do much, so you’re good to go. I’m happy you enjoyed it!
I’ve been Vaping for 2 1/2 years, build my own coils, etc. 3 days ago, my Kayfun Prime arrived. Rarely have I been as excited as I was about this. It came ready to go with the steel tank installed. Because it’s so valuable, I watched several “How to” videos & built my first Kanthal coil, aiming for 1.0 Ohms. Problem #1: it didn’t register on any of my 7 mods – I got a “No tank” error message. Measuring the 510 connector, the Prime is about 3 mm shorter than any of my other 7 tanks. I fiddled, loosened the connector screw a bit & Problem #2: got an awful metallic taste, which continued. I rebuilt until I couldn’t see, bought 3 different packs of pre-made coils with the same results. Changed to the glass sleeve & got the same results. When I can get a hit, regardless of coil, the taste is totally a strong taste of metal – nothing else. That’s what brought me to your fantastic guide. I wish I’d had it 2 1/2 years ago. It’s well written & beautifully organised! What am I doing wrong. Could I have got a lemon? A Kayfun lemon?!!
Thanks! Wicked it perfectly first time!