In this installment of GuideToVaping’s How-To, we’re going to switch out the plates on the Reuleaux RX200 and in the process, we’ll show you how to do it as well. A recent discussion in the office brought us to the conclusion that the Reuleaux RX200 from Wismec is probably one of the most versatile devices on the market. Personalization of this vape mod is simple, it is inexpensive, and the design made so much sense that almost every manufacturer now has a similar device.
Over the course of the last 2 months it seems that Blake Brown has shown us almost everything you can do to personalize the RX200 — from hydro-dipping the mod to changing the color of the screen, there have been many idea’s to make it your own. In his article “5 Ways To Customize Your Reuleaux RX 200”, he mentioned the replacement parts that were available for the devices in section 2, namely the various colors of front and back plates. This very modification is what we’re going to focus on today.
While there are many colors available, it seems that certain plate kits (red, white and black from what I have seen) are being shipped without replacement screen covers, so in the tutorial we’ll also look at the easiest way to remove the glass from your old plate without damaging it.
You Will Need
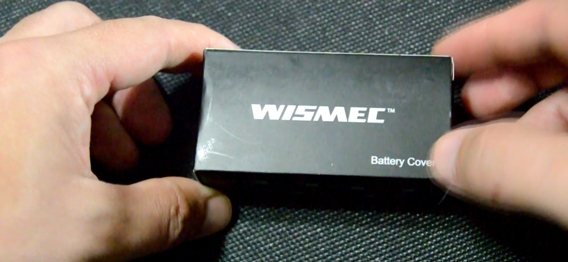
- 1x Wismec Reuleaux RX200
- 1x Set of Replacement Plates
- 1x Phillips Head Precision Screwdriver
- 1x Flathead Precision Screwdriver (if no replacement glass is present)
Find The Colors That Works For You
With all the different colors of RX200 mods and the face plates that can now be purchased to go with them, getting the “right color” is as unique to you as your own finger prints. When I bought my RX200, I got the solid white just because it was a blank canvas. Any of the interchangeable plates look good on a white body but I decided to go with the metallic Cherry Red. These plate’s are among the few that are sold without new glass, so the extra step will be in here.
In The Kit
When I got my plates at a local B&M store, the contents of the pack consisted of 1x face plate, 1x battery door, and 1x warning card. The warning card states:
[blockquote author=”” style=”2″]While replacing the front and back cover, please do not touch the circuit board or screen in case of unintentional damage to the device.[/blockquote]
 Working with any open electronic device can create havoc, even with something as simple as static discharge hitting the board. Make sure you ground yourself of any charge before opening the device. If you are full of static, like I am most days, putting your hand on a grounded metal surface (such as a washing machine cover) can get rid of the charge.
Removing The Old Plates
Taking off the battery door is simple, you probably do it at least once or twice every day.
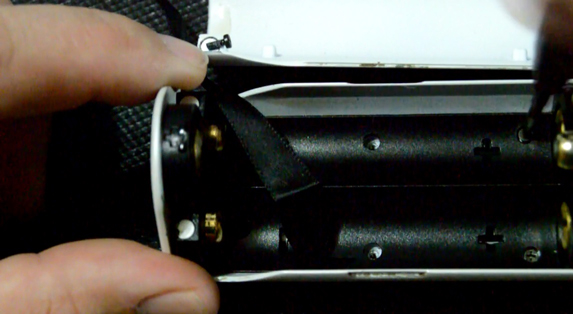
 Remove the batteries from their compartment and you will notice 5 Philips head screws in the back of the bay; 1 by itself at the top of the bay(leave this one alone) and 4 (2 at the bottom and 2 in the center) that you need to remove.
- Be careful when removing these screws as they are tiny and can get lost very easily.
Pro-tip: use the magnet on the old battery door to keep them in one place. - When the screws are out, the front plate will be easy to remove.
- Make sure when you seperate the two pieces that you pay attention to the two buttons that are attached to the front plate and place them to one side.
Removing The Screen Protector/Glass
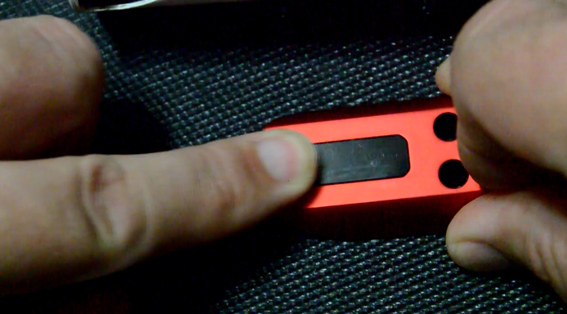
The easiest way I have found to do this is to place the front place face down on the edge of a flat surface.
 Place the front edge of the Flathead screwdriver against one of the edges inside opening being covered by the glass.
- Press down firmly with the screw driver as you gently twist the face plate to one side. The glass should start to lift up slightly.
- Turn the face plate over and pry the glass off the rest of the way using the screwdriver, being careful not to damage the sticky pads that were holding in place.

Inserting Glass Into New Plate
 This step is as simple as drop and stick. The screen protector was cut precisely, to fit exactly into the opening. Just be sure to press it into place firmly so it is flush with the front face of the plate.
Installing The Face Plate
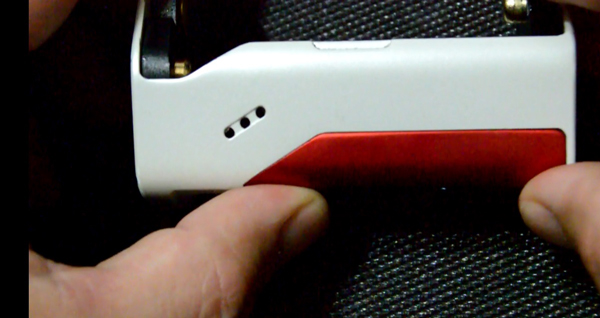
 Put the plate face down on a table top.
- Insert the two buttons that you removed from the original plate.
- Place the RX200 chassis over the top and it will quickly find its correct alignment. Make sure you don’t accidentally hit the circuit board or damage any of the components. The best part about the funky shape of the mod means that this is probably the easiest job you will ever do.
- Insert the screws back into their holes and tighten them into place. Be sure not to over tighten them as they are small and delicate and could potentially break or strip under too much force.
Finishing Up
Reinstall the batteries, put on the new battery cover, and you’re good to go. The process is literally that simple, a two-minute job to completely change the look and feel of your mod.
Need RX200 Colored Faceplates?: GET THEM HERE