
Most issues that vapers face stem from a poor connection between their mod and atomizer. Most of these problems can be quickly and easily avoided if you’re aware of a few simple steps to put your setup together correctly in the first place. Running through this short checklist can be the difference between a happy vaping experience and throwing your mod at the wall, then calling all manufacturers scam artists.
First Things First
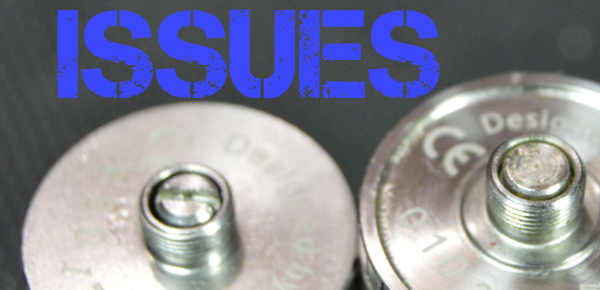
There are different types of 510 connectors. You have spring-loaded 510’s, static (or pressure fitted) 510’s. and screw-head 510’s on the male side of the equation, and spring-loaded or static 510’s on the female side. For an in-depth look at what the 510 is and how it works, you can check out our “What Is A 510 Connector” post from a few moths ago. For a good vaping experience, the connection between these 2 parts have to be solid, and on occasion that just isn’t the case.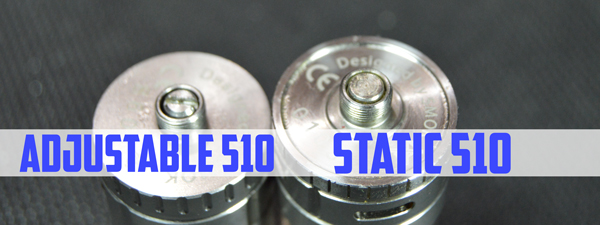
Step 1. Make Sure Everything Is Clean
Any grime on the connection points or inside the threads could cause a problem. Everything can get nasty over time, grit and dirt can get down inside the hole, e-liquid can build up in there if you are a chronic over dripper (like me), and the dirt can either prevent a solid contact or create a short between the positive and negative terminal. Making sure everything is clean and dry before you put it together is the best way to prevent these issues in the future.
If your screen on your vaporizer is reading atomizer short, this is a potential source and your first reaction should be to remove the atomizer and clean the threads, both on the mod and atomizer. A damp piece of cotton wool with warm soapy water should be enough to clean the contacts. Just make sure the mod is turned off before you put anything wet near the contact points and make sure it is completely dry before turning it back on.
Step 2. Does Everything Meet In The Middle?
We have to make sure that we are getting a solid connection between the male and female halves of our system as one of our most common problems is a short positive on the male 510. If you are using a tank system with a semi-flush 510, you may need to use a tool such as a precision flat-head screwdriver to pry it out slightly to get a good contact with the base unit. It won’t take much to get the contact working right, just adjust it slightly, lifting it higher before marrying the components to see if it worked.
The same concept applies to base units with these older style connections. Luckily, more manufacturers are turning to spring-loaded 510’s on mods now and as long the connector isn’t put into the device too low, it makes life so much easier. Screw heads, or adjustable 510’s are self-explanatory, just turn the screw until a solid contact is made, just don’t turn it so much it falls out and you lose it in the carpet forever!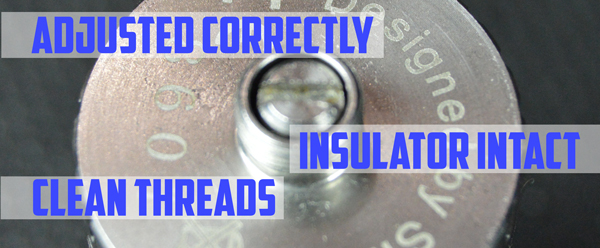
Step 3. Are The Insulators In Good Working Order
Wear and tear is inevitable. We put these machines through hell on a daily basis, drown then in e-liquid, heat them up to crazy temperatures and just expect them to carry on regardless. Over time the insulators between the connection point may get thin or wear out completely (especially on adjustable 510’s), which could cause a short. Replacement parts are extremely cheap, as are complete replacement systems. This area is one that you should definitely pay attention to as it could result in a failure within the system if left unnoticed when you hit the fire button (and are still using an unregulated device without backup safety systems).
If you have paid attention to all of the above, your device still isn’t firing and telling you that you have an atomizer short, the problem may be with the coils, not the connection.


I had a party and there was one guy and he broke my original 510 fully gold plated connector rod (outer screw) he turned the head too tight and it came off, where can I get new cause everywhere Ive searced there aint any
My 520 isn’t working.solder Is good.need to replace.any ideas where to buy it.
This is great information for beginners and even for intermediary vapers! A lot of times a problem seems like it’s insurmountable but it’s often a quick and easy fix once you know what to do!
Ok I got a question for you about a week ago said atomizer short after I changed the coil before it worked fine I tightened everything down and it works fine for about a day and then problems so I tightened it down and it doesn’t read a connection I loosen the tank to where it moves back and forth on the base of the 510 connector and it’ll usually read but I hate doing that because it’s not a tight unit and it hasn’t worked right since I changed the coil and it’ll work loose but not tight any ideas
Same here Andrew, exact same problem. And the ohms read half what the coil is rated for. .06 instead of the rated .12 the coil is rated to fire at.
my mod switches on and off normally. screen reads wattage/ resistance and voltage normally. BUT does not fire at all. when atomiser is removed and fire button pressed screen shows ” no atomiser”. when inserted again the mod recognises the atomiser but it won’t fire. please help
I used the advice from this article and another to fix my shorted prebuilt coil.
the problem might not be the actual screw (510 sorry i know) I recently overtightened the hex head on my squonk atomizer and the 510 is fine, the metal housing between the 510 and the insulator is now free spinning, can’t remove the 510 from it and the mod will no longer read that there is actually anything connected. i’ve tried contacting the maker to see if theres a solution but have had no word yet. superglue doesn’t work and I don’t have a soldering kit or that would be my next attempt. @Jediwookie1 before the complete loss of the atomizer it was doing the same thing, reading a lower resistance than the coil was intended so maybe that’s the problem.