Would you like to know how to rebuild the Dark Horse RDA? While it may not be the newest RDA on the market, it is a firm favorite of mine. To put it simply, the Dark Horse is a great 3 post deck system that is a breeze to both build on and vape. While my Dark Horse is normally reserved for competition builds, designed for throwing the biggest clouds I can pull from the bottom of my lungs, I decided to do something slightly different for the purpose of this tutorial. I have never used the Dark Horse with only a single coil, so today I am going to build a 0.6 Ω single coil with 22 gauge Kanthal A1. I figured, single coil, lower wattage, I may not need to change the batteries in my series box mod every 3 hours with this build.
Before We Begin
As I always state with any build, know the limits of your equipment. Most vaping related accidents occur because of user error. Take the time to learn the Amp limits of your batteries, especially if you are using a single cell mechanical mod. If you don’t want to end up in the local hospital use a coil calculator – steam-engine.org is my personal favorite – and ALWAYS check your build on an Ohm Reader before you attempt to fire it. It isn’t just about knowing if you have got the coils right. Using an Ohm reader may see something that you didn’t, such as a small piece of wire that has dropped on to your deck causing a short. If you had hit that without checking, the possibility of damaging something is very real.
Starting The Build
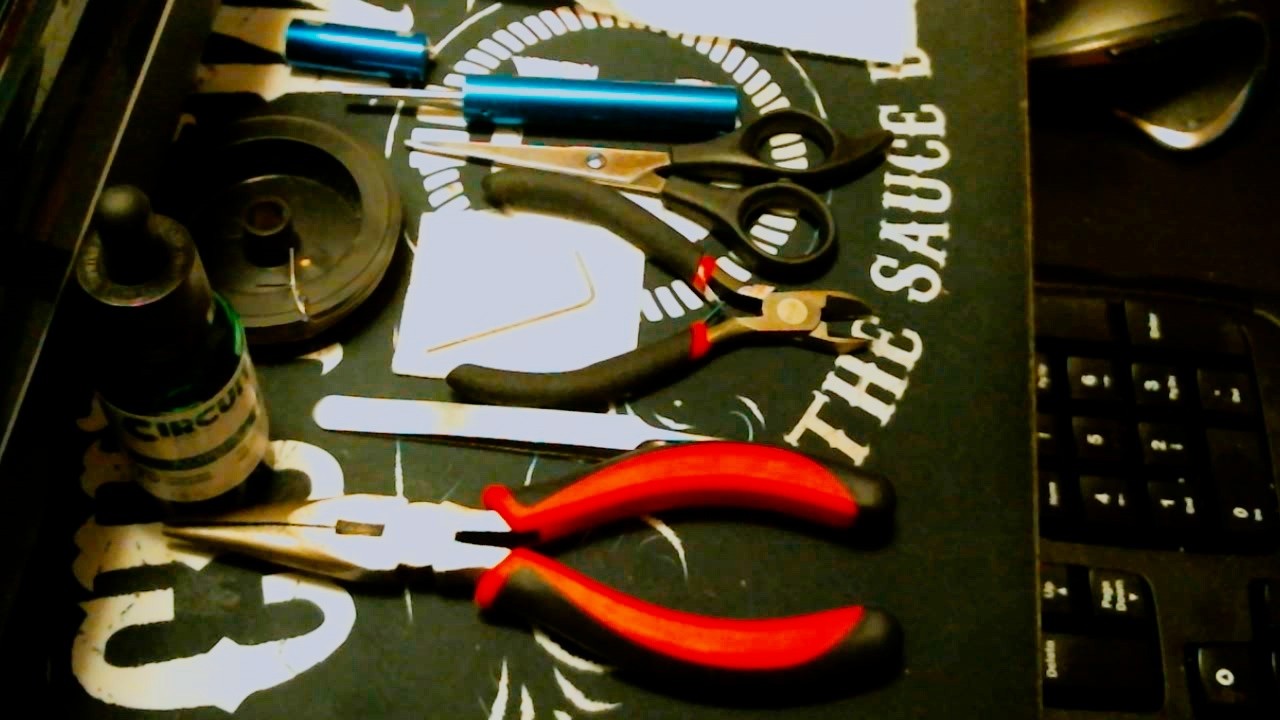
- Coil Jig / Screw Driver with the correct diameter for the coils you will be building – I will be using the Coil Master Coil Jig V3 3.5 mm
- Wire – I will be using 22 Gauge Kanthal A1
- Wicking Material – I will be using Japanese organic cotton sheets, 2 x 2 inches
- Wire Cutters
- Screw Driver – Philips head
- Ohm Reader – I will be using an IPV3 Li as the Ohm reader is the most accurate I have personally found
- Tweezers – If you are using metal ended tweezers, do not attempt to pulse the coils while holding them, as this will cause a short
- Scissors – To trim and shape the wicks
- Vaper Towels – paper towels, you should always have them handy while building
Step 1
If you have an existing build on the deck, use the screw driver and pliers to remove it. Dispose of the old coils by placing them in a piece of paper towel before you throw them in the trash. It may not seem like much, but anyone getting stabbed by the ends of coil legs can be painful and can potentially cause infection. Treat old Kanthal like tiny knives. Clean any debris from the build deck of the Dark Horse RDA, using warm water to rinse out any old e-liquid that may have built up. Wipe out with a clean paper towel, ensuring everything is perfectly dry. Make a visual inspection of the deck, make sure the screw heads aren’t worn and the insulator at the base of the positive post is undamaged.
Step 2
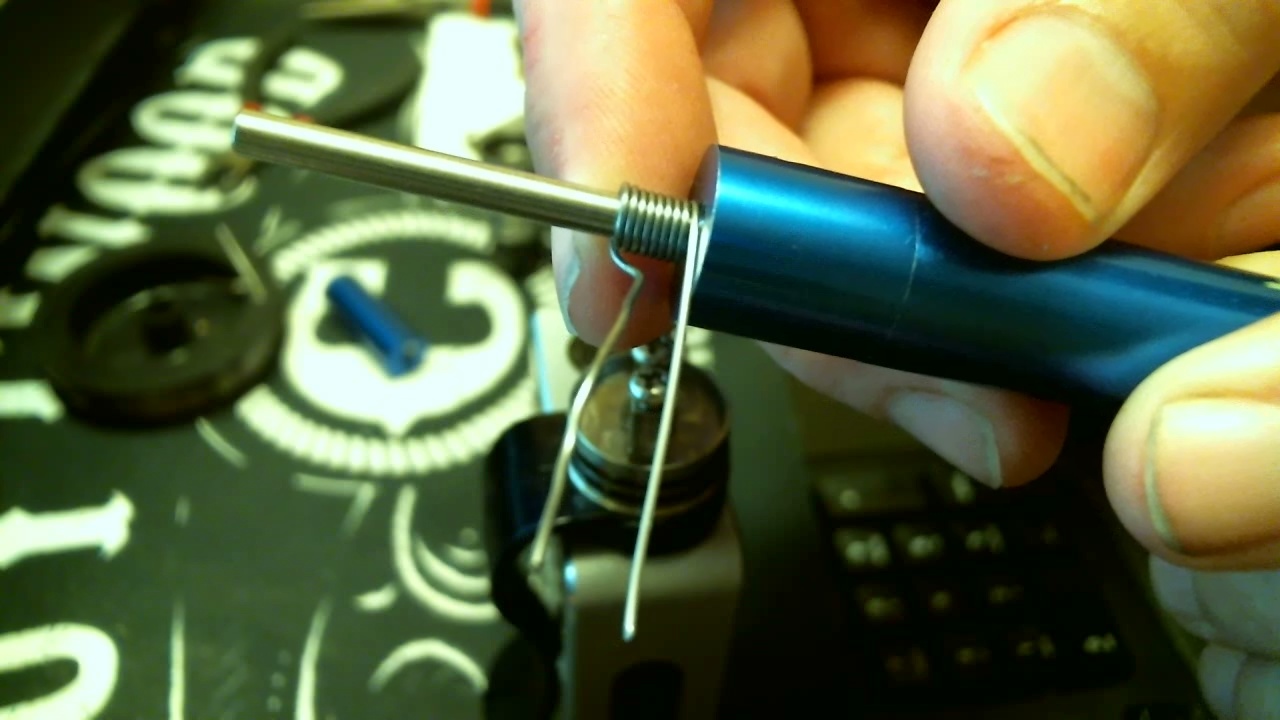
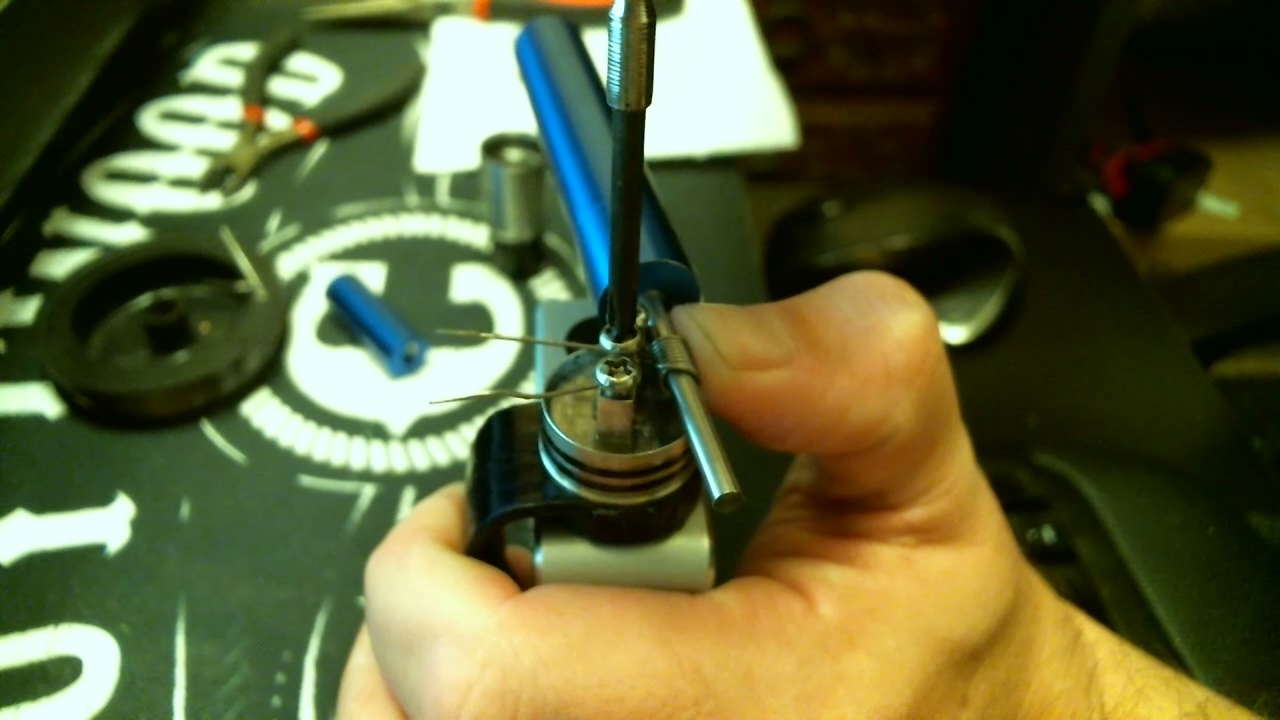
Figure out the coils you wish to put onto the deck. As I stated earlier, I was going for a single coil build at around a 0.6Ω. After consulting with Steam Engine I decided that an 8 over 7 under coil would be what was needed. For this build, the positive lead will be slightly longer than normal as you should always try to pre bend the leg to center the coil.. Use your screw diver / coil jig to create your coil. When you have the correct number of wraps, take your pliers and pull one of the legs backwards to the center of the coil. When it is level with the center , bend it back out in the direction it was originally travelling in. You have successfully pre-bent your leg.
Step 3
As we are only using a single coil, we can get to assembly. Insert the coil into the deck, with the bent leg being inserted into the positive (center) post. If the pre-bend was done right, the coil should be perfectly in the center of the juice well.
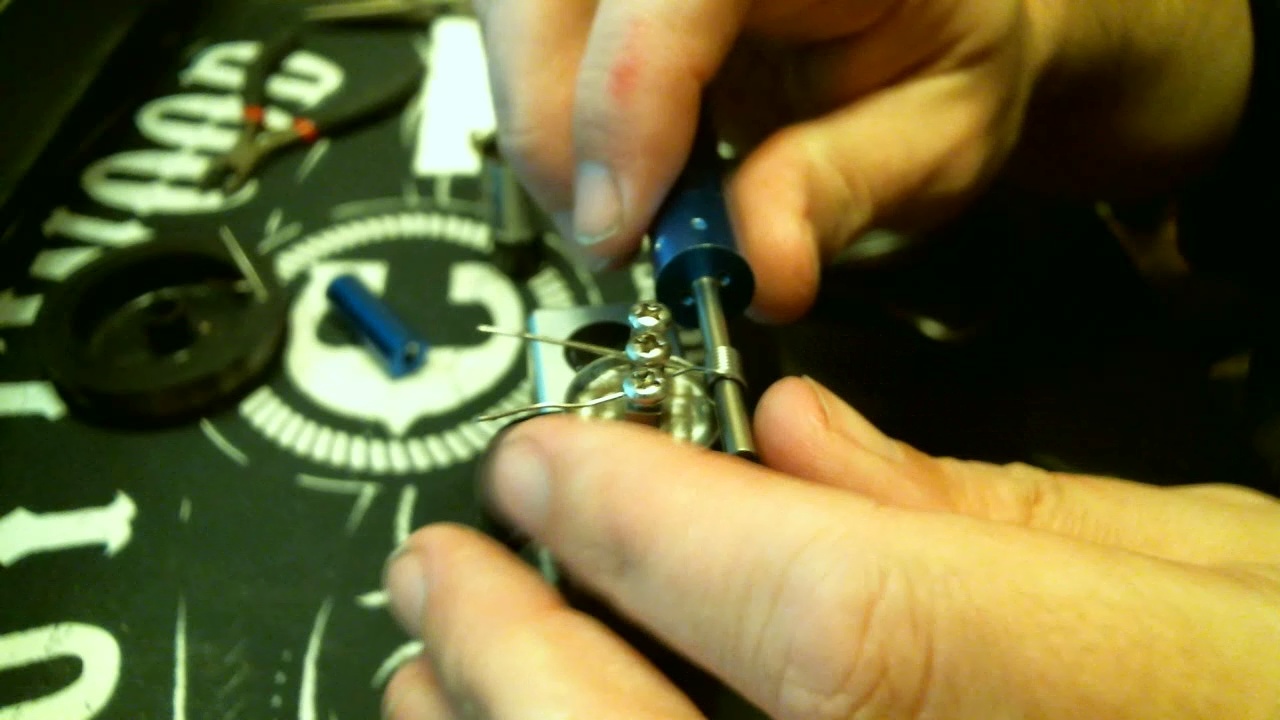
As soon as the legs are inserted, we can begin to adjust the angle of the legs so the coil will sit high in the deck. Personally, I try to ensure the top of the coil is level with the top of the posts to ensure good airflow under the coil.
When you are happy with the position of the coil, you can lock it down using the screw driver, trimming the excess of the legs with the wire cutters as soon as you are done. Make it a habit to trim the wire as close to the posts as you possibly can, this is a simple build where little can go wrong, but as you get into more complicated building on other decks, stray leads can cause hard shorts.
Step 4
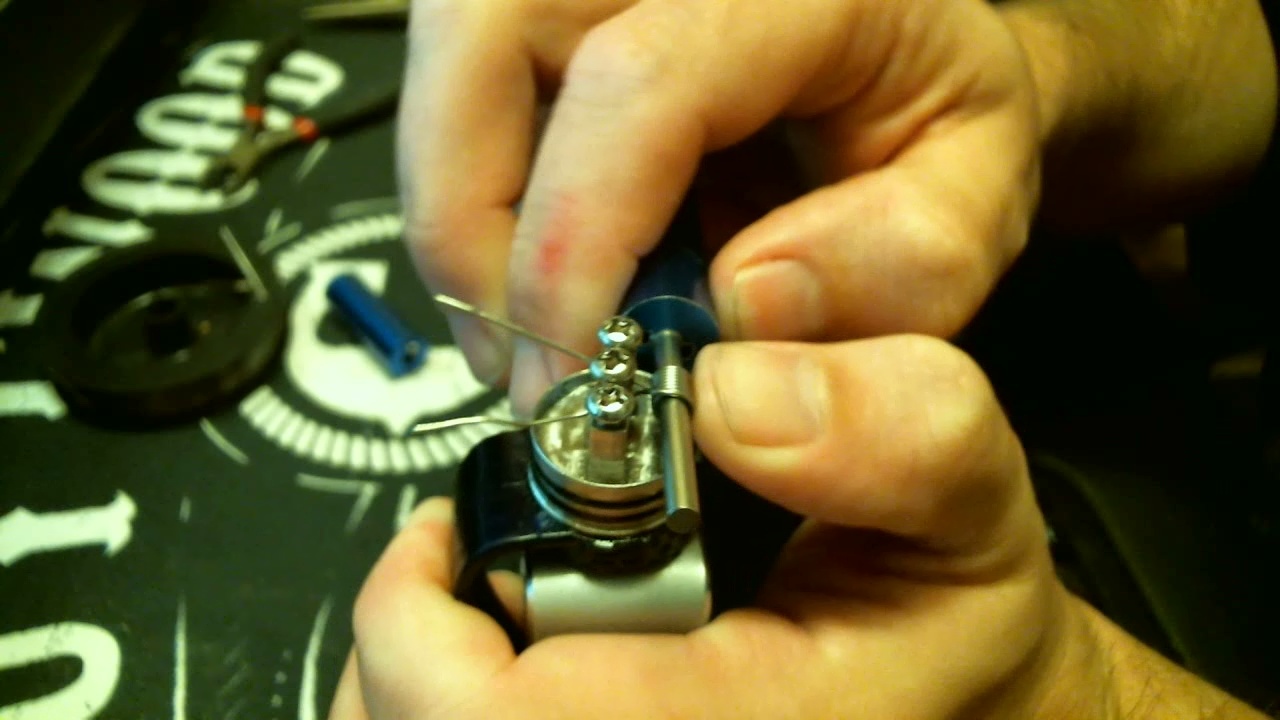
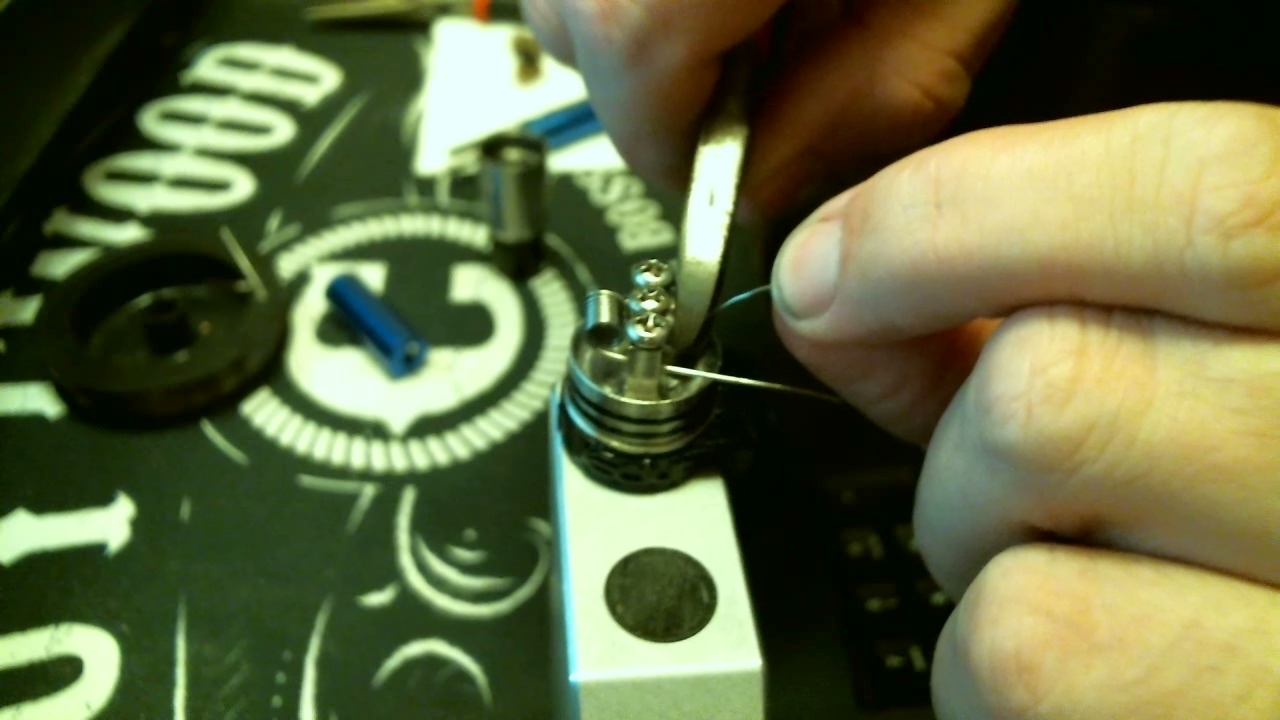
Take a second to check the resistance of your coil. You may be reading slightly high or low but this is normal. If you are reading more than 0.2 Ω off of your intended resistance, you may need to check the tightness of your screws, make sure you have a solid connection at all points. If you are reading ridiculously low, it is possible you have a piece of Kanthal making a hard short between the posts. This is why we always double and triple check our build decks. My initial reading of .42 Ω – shown below – was due to 2 things, a loose negative leg and the fact that I needed to pinch and pulse the coils.
The process of pinching and pulsing the coils brought the build back to the 0.58Ω build I was looking for. To pulse the coils, apply current with short presses of the firing button. At first, the pattern of the coils will be all over the place, but by applying pressure to the coils with tweezers – NOT WHILE YOU HAVE THE BUTTON PRESSED – you can adjust the way the coils glow. You want the glow to be even, firing from the center of the coil to the outside edge. For the first few coil builds, this will be trial and error, but with practice, setting the coils will become second nature. When you are satisfied with the burn pattern of the coils, set the Dark Horse RDA to one side and lets roll the wick.

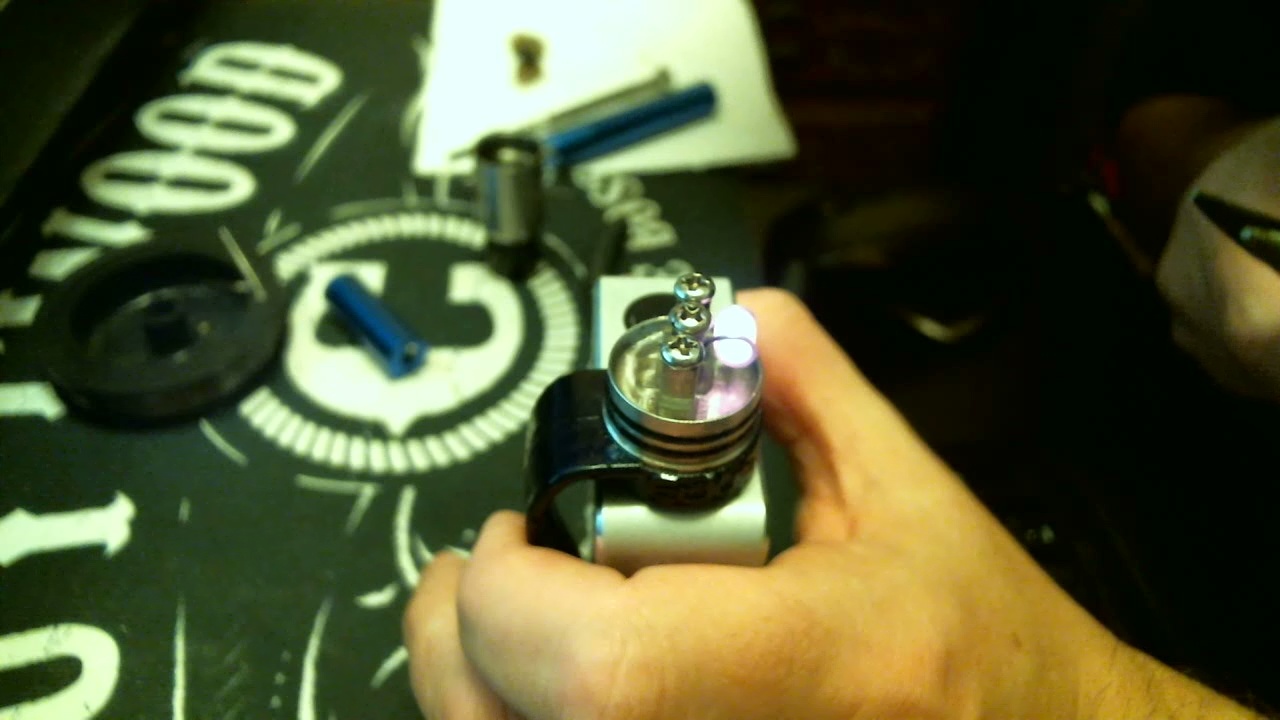
Step 5
Take your pick of 2 x 2 inch Japanese cotton, or which ever wicking material you decide to use and prepare it to be inserted into the build. When using these cotton pads, I normally take away half of the thickness – one pad is normally enough to wick 4 coils – and then cut it in half, down the length. I will gently roll one of the pieces into a cylinder, making sure that it is small enough to fit snugly into the coil. To make life easier, you should tightly twist one end to get it through the coil, but don’t worry as this will be trimmed off in the next step. Pull it through until both sides of the wick are approximately even and trim off the end that is twisted.
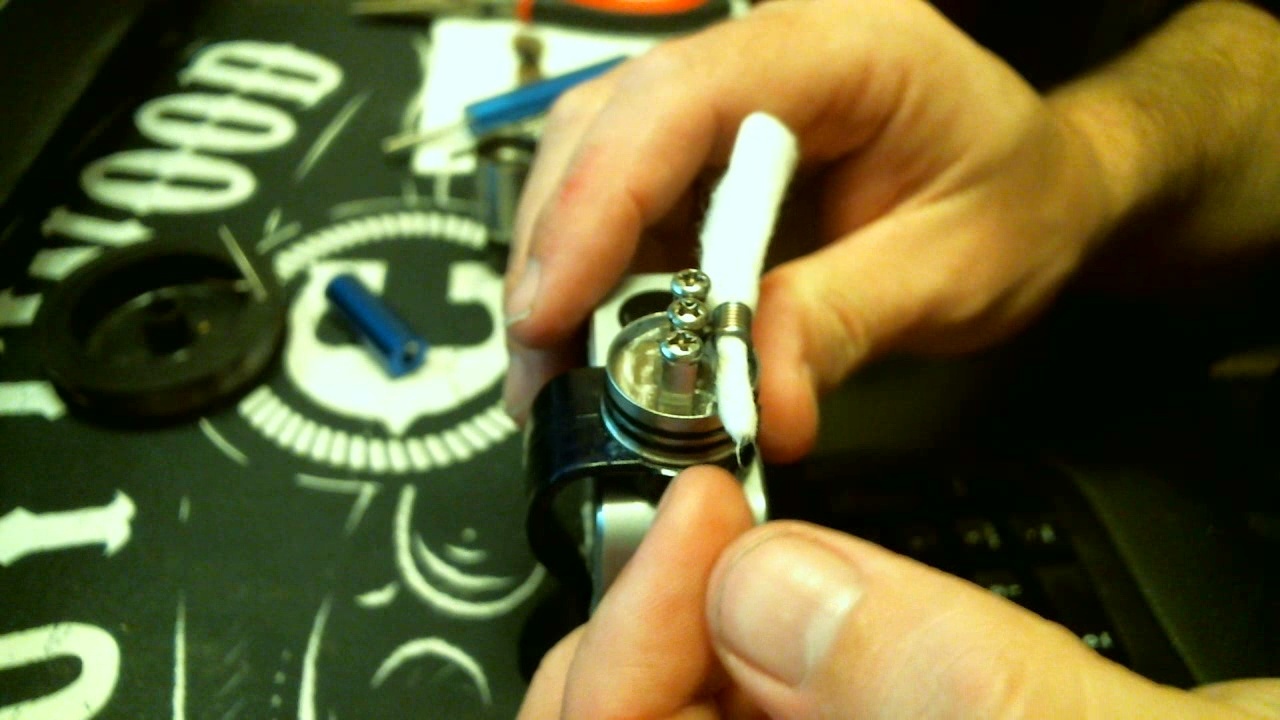
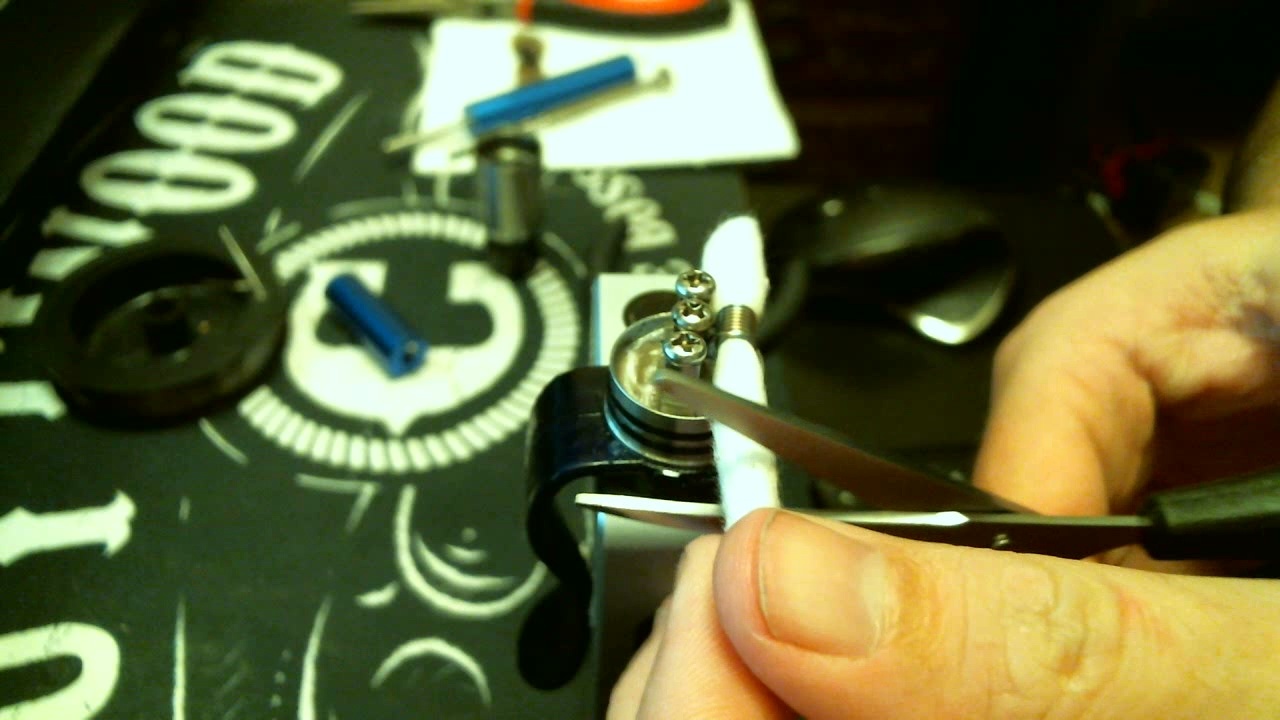
As this is a single coil build, I decided to go with a wicking method I haven’t used in a while. The negative lead side of the wick will be brought all the way under the coil to fill one side of the juice well while the other will be brought through the posts to cover the other side of the deck. While it may sound complicated, it ensures you don’t end up with an RDA that has half a deck full of e-liquid that can leak everywhere. Pull the negative end underneath the coil and trim it at the far end. Make sure it fits into the juice well and move on to the other side. You may need to open up the screw that is not being used to get the second wick to the other side of the deck but it will not restrict the e-liquid flow to the coil.

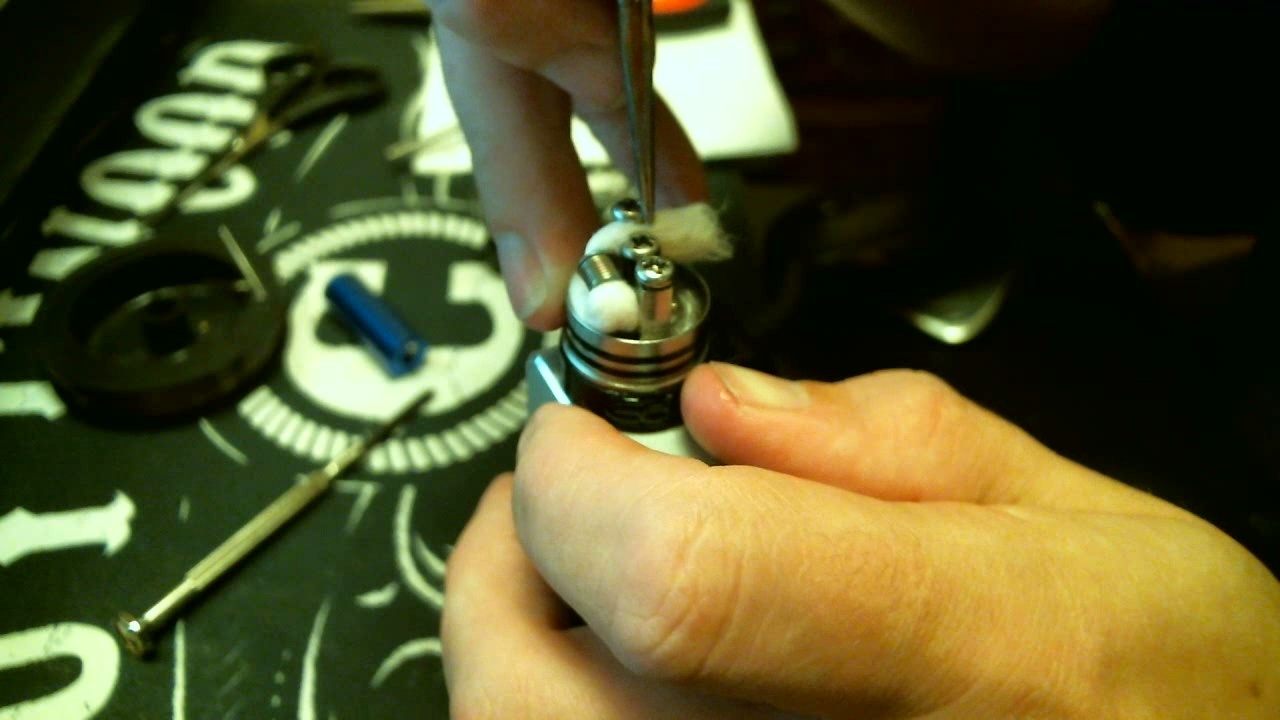
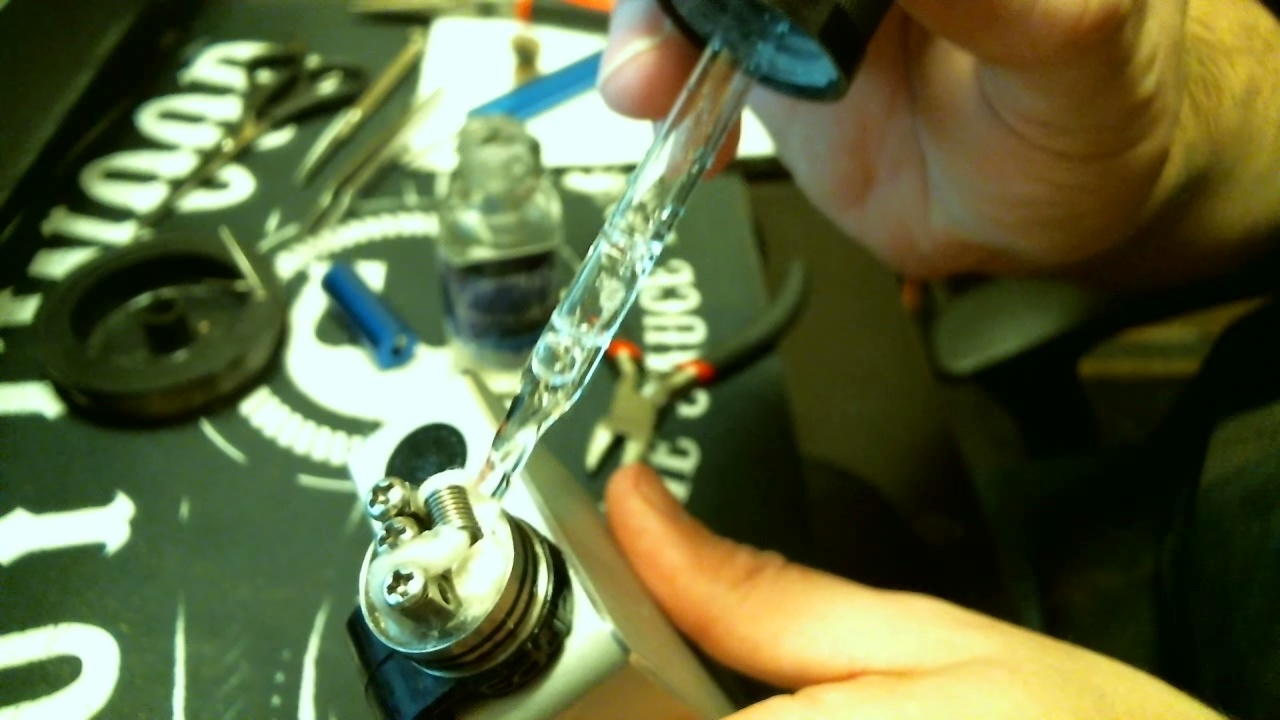
When completed, make sure there is an airflow gap beneath the coil and you will be ready to saturate the coils. Pulsing the coils at a low setting as you drip will allow the e-liquid to warm up and be sucked into the wicks faster. Apply e-liquid until the wick appears to be completely saturated. At this point, I generally fire the device to get all of the e-liquid I just put onto the wick to disappear as this helps to remove any new cotton taste from the build.
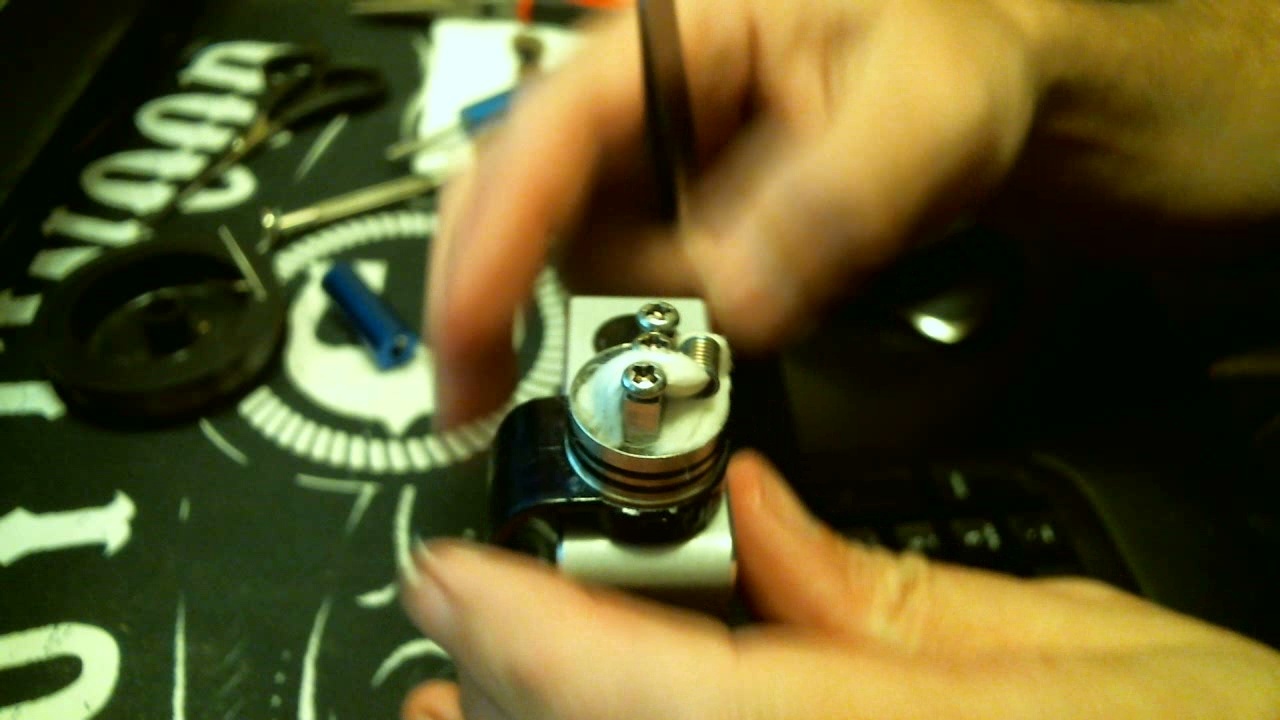
The last thing to do is ensure that the cap is adjusted for single coil airflow and its time to vape to your heart’s content.
I hope that this build tutorial was helpful and that you can take some knowledge from it. As I stated at the top of the post, the Dark Horse RDA is one of my favorite’s and is something I always come back to.
As always, enjoy your vaporizer and vape safe!