

For the last few months, I have heard people asking how to wick with the Scottish roll. At first, I thought it was a new brand of cake or something scrumptious to eat, but as it turns out its nothing more than a way to make your vaping experience more pleasurable. From personal experience with putting cotton in my coils, this is the kind of information I wish someone would have told me 2 years ago when I first started building on my own RDA’s. Kick back and relax, we are going to spend the next few minutes discussing the pro’s and con’s of using “The Scottish Roll”, where it came from and how it can be used to further your vaping journey.
The Birth Of The Scottish Roll
The first time we saw this wicking method make an appearance on YouTube was September of last year. A YouTuber by the name of Cheesebanana published his video “How to wick an RDA effectively, and avoid dry hits”, and the comments section took care of the rest. The fact that he is a Scot and was rolling his cotton gave the method an official nomenclature. For some reason, the eyes of many vapers were opened for the first time as they figured out that in the world of wicking, more is better. My personal demons with vaping were dry hits, having to change the cotton to often for my liking and feeling that I to drip every three or four hits. Here was a method that claimed to take away all of my vaping problems with one piece of 2 x 2 organic Japanese cotton. The hype was real and quickly other people withing the industry were raving about the effectiveness of the Scottish roll. If you haven’t tried it yet, here is a quick tutorial to get you vaping more, dripping less and wasting less cotton in the long run.
Tutorial
The following tutorial uses existing 3mm inner diameter coils that I had sitting in my CCi Archon RDA. If you do not have coils already built, we have many tutorials on this site, along with many others around the internet. We will be focusing solely on the wicking portion today.
What You Will Need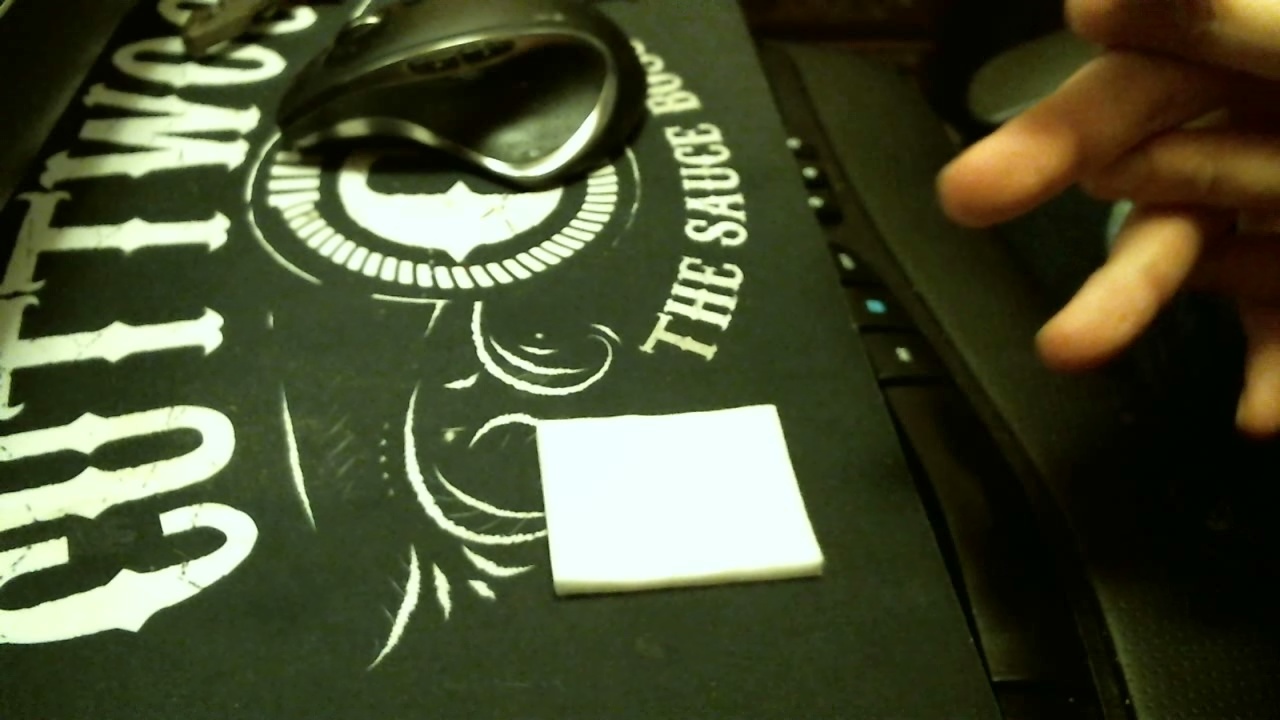
- 2 x 2 organic Japanese cotton sheet
- Scissors
- Small screwdriver to tweak the wicks
- Coils to put the wicks in
Step 1
Remove any old wicking material you have in the coils. Dry burn the deck to clean any residue that may be left over. I have found that pulsing the coils until they are extremely hot and then blowing on them removes the majority of the gunk that has built up. For anything more stubborn, a small flat head screwdriver scraped across the coils will help to remove it. Ensure that your coils are burning evenly from the center to the outside edge, if they are not, pulse and pinch the coils until they are perfectly in unison.
Step 2
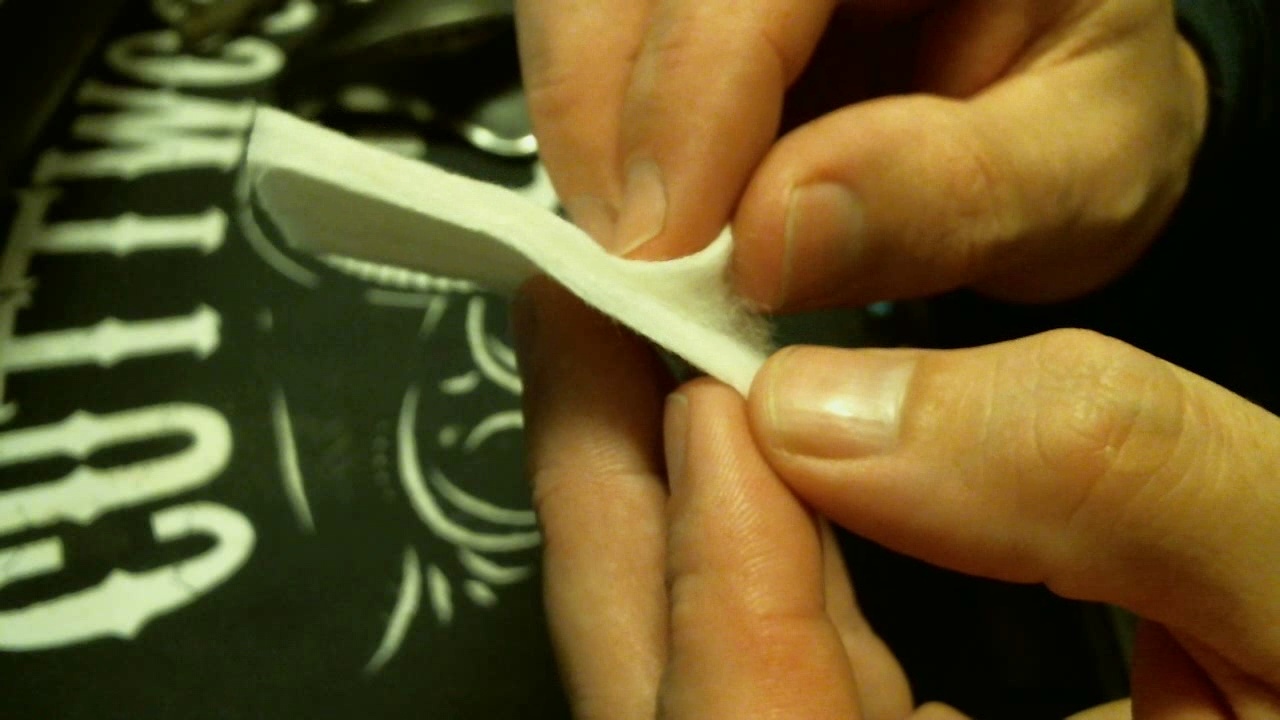
Take your 2 x 2 cotton sheet and peel the top third away. We will be using the remaining two-thirds of the sheet for the wicks, the top part is either trash or to be used for thinner coils. Personally, I save this part of the sheet for the simple fact that the next time I peel a sheet, I can put the two together and make my third set of wicks from what would have basically been thrown away.
Step 3
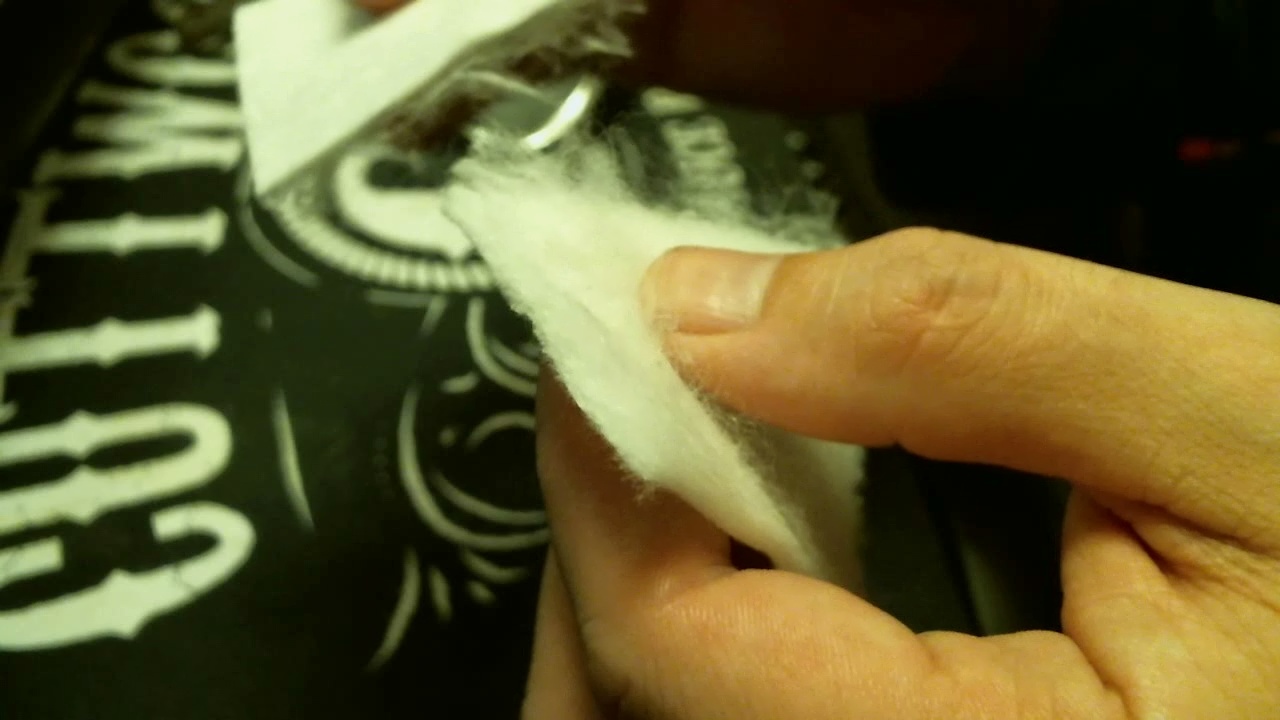
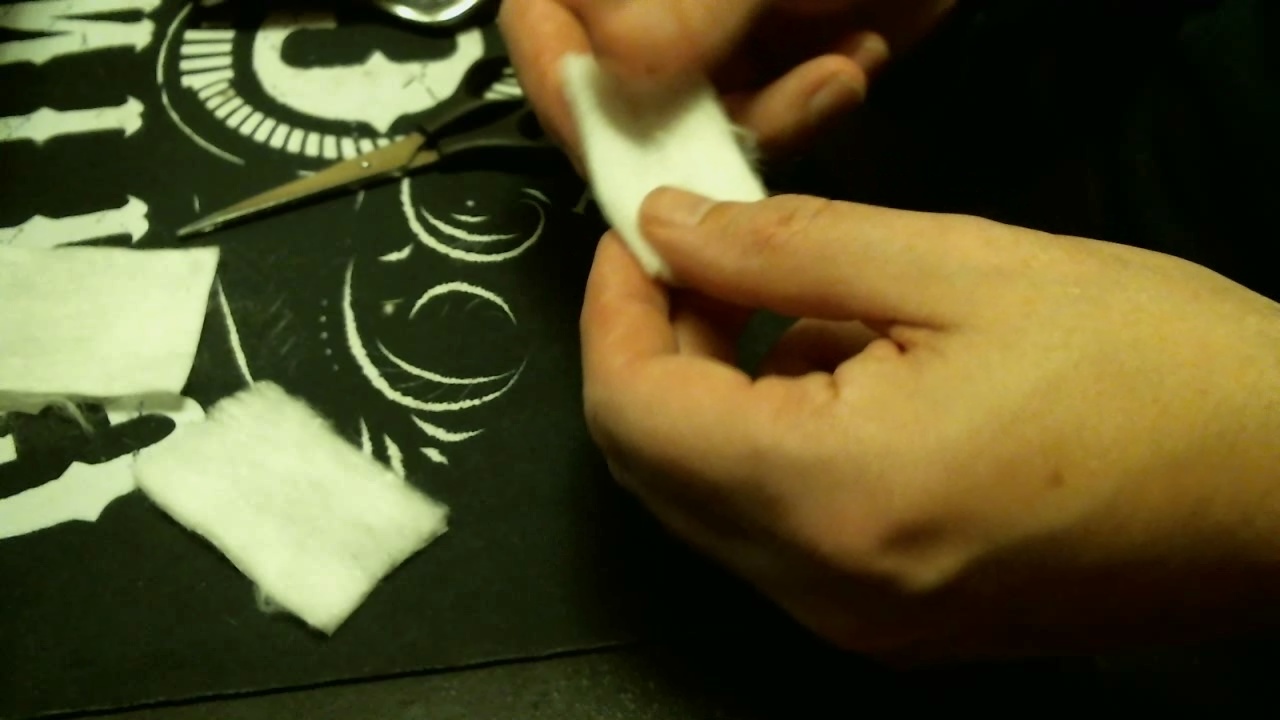
Gently fluff the remaining sheet sideways until it is approximately one and a half time the size of the original sheet. The solid side of the cotton will break up and become as fluffy as the rest, do not worry as this is normal. You will know when you have gained the right consistency in the material because it will become almost see through.


Step 4
Take the sheet, fold it in half and cut it in half, making sure you are cutting in the direction of the threads and not across them. Put one sheet down and prepare to move to step 5 with the remaining piece. After you have completed step 5 with one piece, repeat with the other.

Step 5
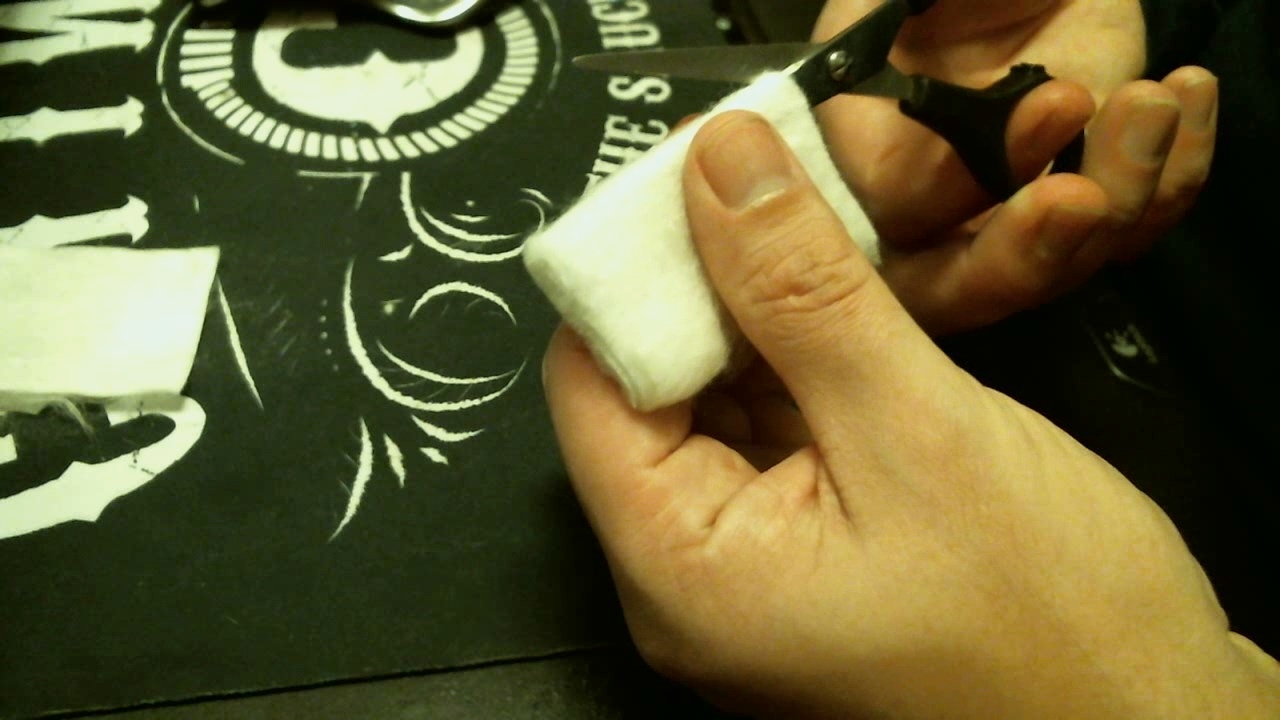
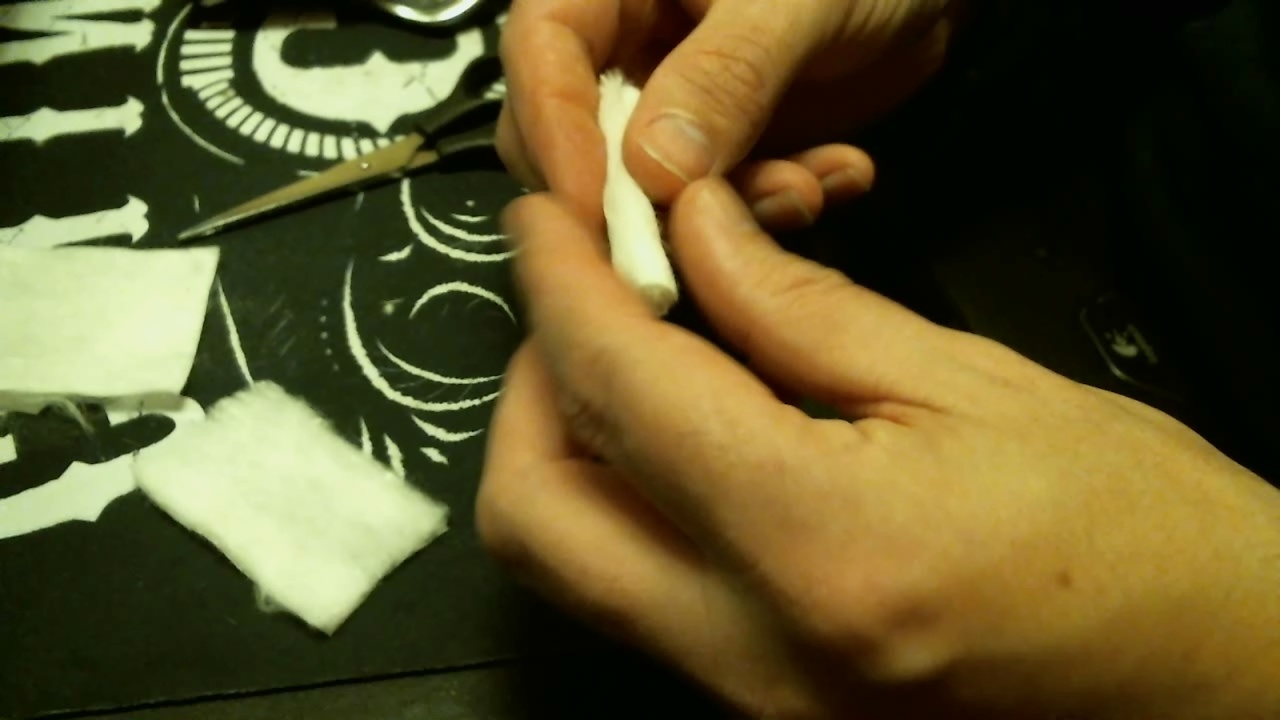
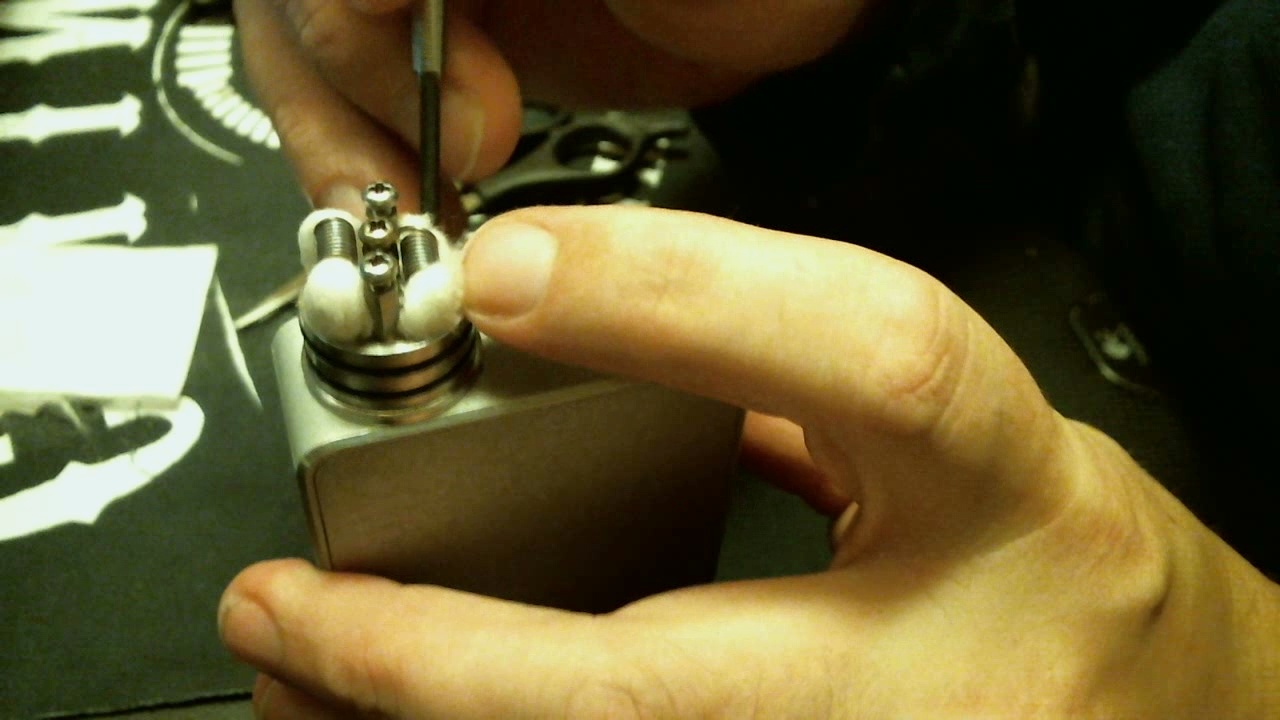
Take your sheet between your thumb and forefinger on each hand and begin to gently roll the cotton. You want to keep the cotton as fluffy and full of air as possible at this point. It will form into a perfect cylinder with a little work and you will be ready to move on when it is just a little bigger than the inner diameter of your coil.
Step 6
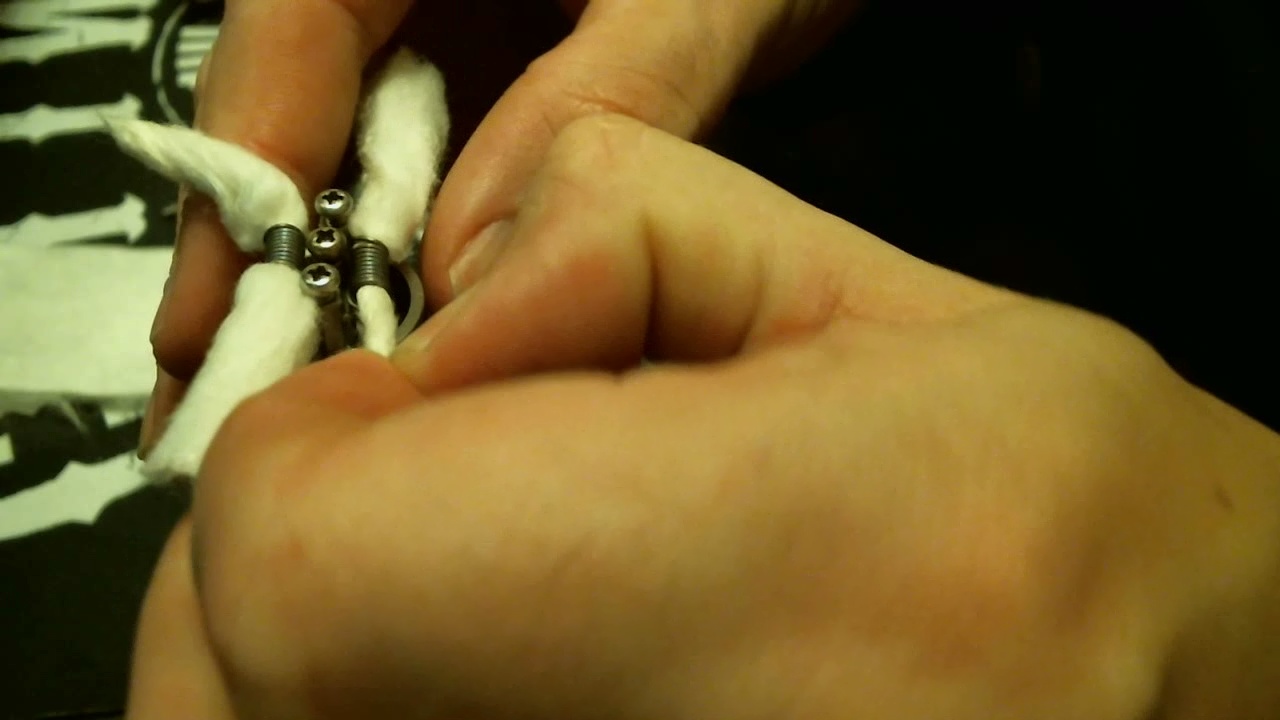
After completing both wicks, you are now ready to install them. Twist one end of the wick tight, making sure it is small enough to pass through the coil unincumbered. After this has passed through, the remaining wick will start to feel tight on the inside of your coils. Pull it through until you have an even amount on each side of the deck. The wick will possibly feel too tight to get through the coil, but with a little pulling, it will go. As soon as you have installed the first wick, turn the deck around and put the other one in place.

Step 7
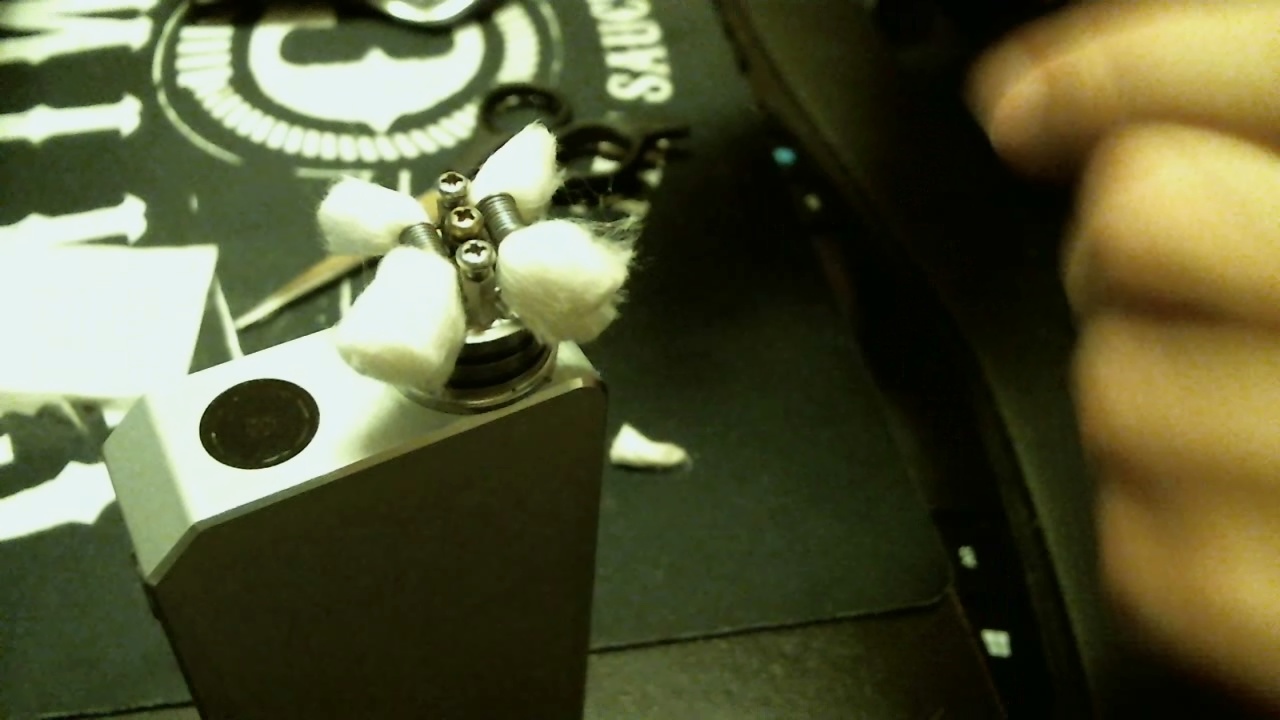
You only want the wicks long enough to touch the bottom of the deck. They do not need to be any longer as too much wick will impede airflow to the coil. Once you have determined the depth of your juice well, trim the wicks accordingly. After trimming, fluff the wicks and then gently push them into their respective homes. Make sure that the area directly beneath the coil is free of obstruction for the reason stated above.
Step 8
When you are happy with the placement of the wicks, it is time to saturate them with e-liquid. Gently paint the coils until you can see that everything has changed from fluffy white cotton to dark, wet and ready to vape. Pulse the coils a few times to help suck the juice deep into the cotton before semi drying it to get rid of the new cotton taste.

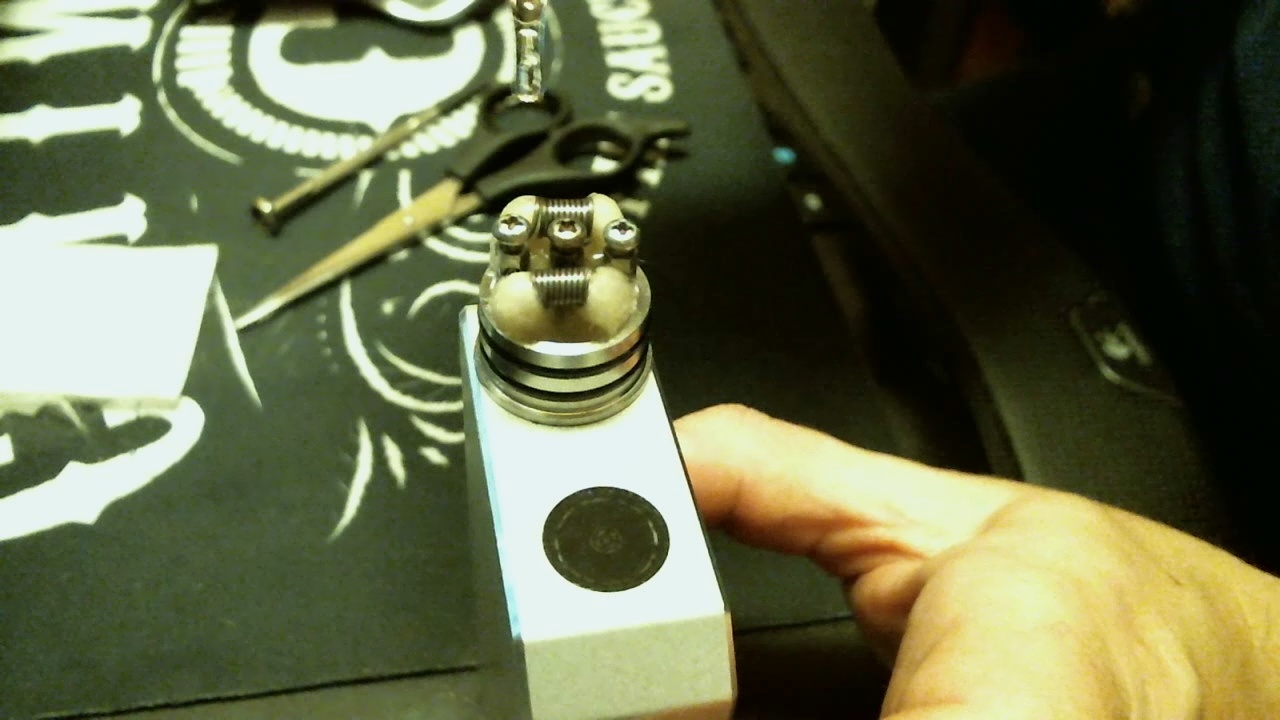
Step 9
After you have purged the new cotton taste from the wicks, wet them again and you are good to go. You have just completed your first set of Scottish roll wicks. Congratulations!

Conclusion
The main purpose of the Scottish roll is to generate less dry hits as the amount of e-liquid that is absorbed into the wick is ridiculous. When done correctly, the Scottish roll can generate 20-30 small hits without the need for dripping. I can attest to the effectiveness of this wicking method as between this and the Sushi Roll that I also use, I have all but eliminated dry hits from my vaping routine. Give it a try and see if it works for you, just remember that when it comes to wicking more in the coils is better.
As always, enjoy your vaporizer and vape safe!
Original video from CheeseBanana included below:
[youtube http://www.youtube.com/watch?v=Yf-V0H4DnFo&w=560&h=315]


sushi roll or Scottish roll? Which is the most overall best technique,in your opinion? Really appreciate your tutorial. respect. pat
For what I’ve seen and tested, the Sushi rolls wins. I got more than 40 pufs with a Noisy Cricket and you don’t waste any cotton.