

iJoy RDTA Box Mini Tips
Tank Capacity & Replacement: When you buy the iJoy RDTA Box Mini, it comes equipped with a 6mL reservoir that can be removed for cleaning or replacement. To access the tank there are 4 torx screws positioned on each corner at the top of the device. As an extra option, you can replace the 6mL tank with a 2mL tank. 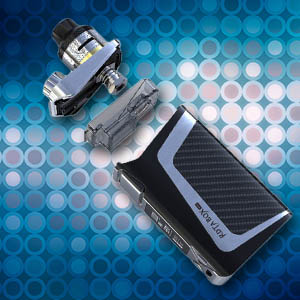 I’ve talked to iJoy and the tanks are not yet available for purchase, but both the 2mL and 6mL reservoirs will be available in the future.
Accessing The Battery Compartment: Though you shouldn’t need to access the battery compartment, since there is a built-in 2600mAh Li-Po battery installed, in the event that you do wish to access its compartment, there are 2 torx screws at the bottom of the device that would need to be removed. Once you remove these screws you can simply slide the battery cover off the device.
Optional Stand-Alone Box Mod: One of the unique perks to owning the iJoy RDTA Box Mini is that you can use it as an all-in-one mod, or you can remove the RDTA section and replace it with a 510 atomizer or tank of your choice just like you would with a regular box mod.
Interchangeable Build Deck: The RDTA Box Mini has an interchangeable build deck, meaning you can use different build decks that are applicable for this unit. The RBM-C2 0.2Ω coil head comes pre-installed, while there’s also an RBM two-post velocity style deck that is included in the packaging that can be used.
[mks_button size=”medium” title=”GET THE iJOY RDTA BOX MINI MOD HERE” style=”rounded” url=”http://bit.ly/2nEcihj” target=”_blank” bg_color=”#000000″ txt_color=”#FFFFFF” icon=”” icon_type=”” nofollow=”1″]
Intensity Setting: The intensity setting (or strength) can be accessed within the menu. By pressing the adjustment buttons you can switch between 4 modes. Below are the different modes you can choose from and we will list what these modes do.
- Norm Mode: Maintains the current set power.
- Hard Mode: 30% higher than the current set power.
- Soft Mode: 20% lower than the current set power.
- User Mode: With the user mode you can customize the power output for the first three seconds of each puff, with each setting column representing half a second.
New Atomizer Installation: When using a new coil, detaching or attaching an atomizer, the system will prompt you to confirm this change saying “New coil +, Same coil -”. If you’re using a new coil press the right adjustment button. If you’re using the same coil press the left adjustment button. When in doubt, press the right adjustment button so that the system can re-calibrate. However, we highly recommend that when in TC mode that you let the coil cool down to room temperature. If the coil isn’t at room temperature, the system may read values incorrectly.
Variable Wattage (VW) Mode: While in the variable wattage mode you have the ability to adjust between 5 watts and 100 watts by pressing up or down on the adjustment buttons. The left adjustable button will decrease the wattage, while the right adjustment button will increase the wattage. In VW mode you should only use Kanthal and Nichrome coils. Any addition coil or wire types should be used in temp mode or TCR mode.
Temperature Control (TC) Mode: Using the temp mode you have the ability to utilize Ni200 Nickel, Titanium, and Stainless Steel coils. To access the temp control feature of this device, you need to enter the main menu, then switch to the “T” setting, and then press the fire button to confirm. You can then switch between each mode that is best suitable for the coil type you’re using.
TCR Mode (M1, M2): Using the TCR (Temperature of Coefficient of Resistance) mode you have the capability to set parameters according to a coils specific TCR value. To access this feature, enter the main menu, switch to the “T” setting, then press the fire button to confirm. Now switch to either M1 or M2 and press the fire button to confirm once again. If you need more information about TCR, we strongly suggest that you check out our What Is This TCR Mode? article.
Upgrading Firmware: To upgrade the iJoy RDTA Box Mini, you will need to connect the device to a computer via the USB cable that was included in the packaging. Start by pressing the two adjustment buttons together while pressing the fire button at the same time to enter the upgrade process. Now release the two adjustment buttons first, then release the fire button there after. Next upload the latest firmware. Once the upgrade process in complete, press the two adjustment buttons once again to reset the device.


Great mod, but I been curious – can you use bf rda’s with this? Like Hadaly or NarDa?
I had the RDTA Box.. In fact THREE of them, and they all crapped out due to leakage. Ijoy refused to cover any under warranty claiming it was my fault (search the web, it’s a common problem). I have several decks from the RDTA Box. Are they interchangeable on the mini?
Same here Andrew. I purchased one for myself and really liked it, so I purchased one for my friend after about a week of owning mine. Well that was a mistake! Mine crapped out after about a month. Luckily he barely used his and I bought it off of him. I wrapped clear tape over the entire thing as to ward off juice/dirt dripping down the outside and getting in around the buttons and I think this did help….for a while. Tape wore away and guess what. A few weeks later the screen quit working. I like a lot of the features of this device. Love the tank and recessed rta. It looks sweet. That’s where my love for this device ends. The fire button is junk. As soon as you get some use on the device the paint on the sides of the button wear away. Then the button starts sticking causing auto fires and dry hits. The tank isn’t a great fit and does leak from time to time which runs down the inside of the device right onto the circuit board. After this happens a few times the device will start to malfunction such as screen not working, dying all together and other erractic behavior. Also the charging port is very weak and with the shitty battery this thing has you will be constantly plugging and unplugging the charging cord(no passthrough-booo) which over time will cause the charging port to become weak and break. If these things only cost $10 they’d be worth it for the short use you get out of them but at $45 or so they just are not worth the headaches. I am hard on my vape rigs. And I do break most of them over time albeit a much longer time than this one takes. Except for my old Provari. That baby just keeps on going. Good try I-Joy. Why don’t you guys man up and send me a new one? I mean you guys can’t have $15 worth of parts into the thing. Make it right. $100 for two devices and six months(that’s giving them credit) is mighty pricey wouldn’t you say? I won’t hold my breath. I would have said I won’t hold my vape, but your device isn’t producing any at the moment. Its Junk Oh Yes-IJOY
I’ve had mine for a few months and the only time it ever leaked was because I left it in the car by accident and I assume it got to hot and maybe the liquid expanded. Other than that it’s been fine. How long did you have your before it doing it?
Had mine for 2.5 days. The left arrow key has screwed up and the menus act like the right is perminently depressed. I wouldn’t recommend it.