Kanger Nebox Tips
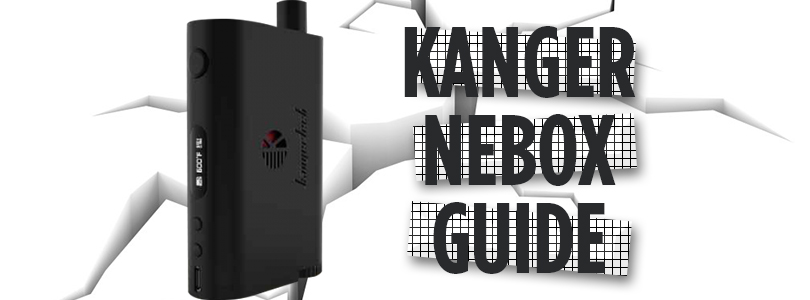
Installing The Battery: To install a battery, turn the mod upside down to locate the battery compartment cover. By using a coil, insert the coil into the slot on the cover and unscrew the cover by turning it counter clockwise.
Charging The Battery: You have an option of removing the battery and charging it on an external charger or you have the option to leave the battery inside of the device and charge it via the micro-USB port positioned on the control face of the device. Simply attach one end of the micr-USB cable into the device and the opposite end into a USB power outlet.
Priming The Coil: Before using the Nebox, you’ll want to prime the coil first, even if the coil is pre-installed into the device. After removing the coil from the device, you will want to squirt small drops into each juice whole where the cotton wicking is exposed. Each time you make a drop onto the cotton wicking, let the e-liquid soak up, then apply another drop. Continue doing this until the cotton is no longer soaking up the e-liquid.
Installing A Coil: To install a coil into the Nebox device, turn the e-liquid cover, positioned at the bottom of the device, counter clockwise by sticking a coin in the airflow slit. Unscrew the cover, then unscrew the old coil from the cover and replace it with your new coil. If the tank has e-liquid in it, you’ll want to make sure you keep the device upright so that e-liquid doesn’t spill during the coil changing process.
New Coil Prompt: When you first install a new coil and turn the device on, it will display a new coil prompt on the screen. The device will ask you if you installed a new coil or not so that it can recalculate the resistance of the coil in the case that you did. Press up if there is a new coil installed or press down if it’s the same coil.
Filling The Tank: To fill the tank, start by removing the e-liquid cover. Once the cover has been removed, fill the tank with e-liquid by squirting e-liquid onto the sides, avoiding the center airflow shaft. Continue filling the tank until you’ve reached the fill line on the tank, then simply screw the e-liquid cover back onto the device.
Airflow: When using the Nebox, keep in mind that the airflow is positioned at the bottom of the mod. Due to the airflow positioning, you’ll want to always make sure that your hand or anything else isn’t covering the airflow slit. Periodically check the airflow slit to ensure there isn’t anything blocking the airflow, such as lent from your pockets.
Resting Position: When you aren’t using the Nebox Mod, always make sure that the mod is standing upright. If you leave the mod on its side for any duration of time, there is a high potential that it will leak.
Known Issues: The Kanger Nebox has a few known issues. The most common issue found with the Nebox Mod is that it leaks. Most times the leaking is caused by either the stock coils that are included with the kit (known to leak), air pressure trapped in the tank from opening and closing the e-liquid cover, and e-liquid being too thin. Typically, if you’re experiencing leaking issues it’s due to the air pressure trapped in the tank. Since there isn’t a way to adjust the airflow, it would be hard to avoid this issue. However, sometimes the leaking is caused by the stock coil that comes with the kit. When I was using the Nebox, I would only use the Kanger Square OCC Coils (0.5 ohm). I found the Nebox to leak less, but there was definitely still a leaking issue. Leaking can also be caused by improper resting position as well.
[mks_button size=”medium” title=”GET THE KANGER NEBOX HERE” style=”squared” url=”https://www.directvapor.com/premium-mods/kanger-nebox-60w-tc-starter-kit.html?A=1025″ target=”_blank” bg_color=”#000000″ txt_color=”#FFFFFF” icon=”” icon_type=”” nofollow=”1″]


